Handling push notifications on Android
PingOne Android
When a user signs on from an accessing device, the PingOne MFA service can send a push notification to the user’s paired mobile device.
Your app processes this notification, shows the approve and deny actions to the user, and reports their response back to PingOne, which completes the sign-on on the accessing device.
The pingonemfa module provides the functions for each step:
-
The user signs on at the accessing device and PingOne sends a push notification to the paired device.
-
Your app receives the message from Firebase Cloud Messaging and passes it to
processRemoteNotification, which returns aPushNotificationobject. -
Your app shows the approve and deny options, or the number-matching challenge if the push type is
CHALLENGE. -
Your app calls
approveNotificationordenyNotificationon thePushNotificationobject with the user’s response.
Registering the push token
The PingOne MFA service sends push notifications through Firebase Cloud Messaging, so it needs the current FCM token to know where to reach the device. The pingonemfa module’s setDeviceToken() method sends the token to the PingOne MFA service, which records it against the device identity that the module established when it was initialized.
Registering the push token is independent of pairing. You can call setDeviceToken() before the device is paired to a user: it updates the service’s record of the device only, and the token becomes usable only after the device claims a pairing key in a DaVinci flow.
Firebase rotates the token when the app is reinstalled or its data is cleared, so register it at application startup after initializing the module, and again whenever Firebase issues a new token, by calling setDeviceToken() in the onNewToken function:
override fun onNewToken(token: String) {
    CoroutineScope(SupervisorJob()).launch {
        PingOneMFA.setDeviceToken(token)
            .onSuccess {
                // Uncomment when testing; see Testing push notifications
                // if (BuildConfig.DEBUG) {
                //     Log.d("FCM", "Registered. FCM push token: $token")
                // }
            }
            .onFailure { e ->
                Log.e("MFA", "Token registration failed: ${e.message}")
            }
    }
}
If registration fails in some regions but not others, the PingOneMFAException.internalErrorsList property holds one error per failed region.
|
It can aid debugging to display the FCM token in the log during testing. It is best practice not to display these tokens in production code. For example, you could wrap the log message in a |
Receiving and processing the notification
Messages arrive through Firebase Cloud Messaging.
In your FirebaseMessagingService, pass the remote message to the pingonemfa module’s processRemoteNotification method, which returns a PushNotification object:
// In FirebaseMessagingService.onMessageReceived:
if (remoteMessage.data.containsKey("PingOne")) {
    CoroutineScope(SupervisorJob()).launch {
        PingOneMFA.processRemoteNotification(remoteMessage).onSuccess { push ->
            if (push == null) {
                // Silent push — the module handled it internally; no user action required
                return@onSuccess
            }
            when (push.getPushType()) {
                PushType.DEFAULT   -> showApproveDenyUI(push)
                PushType.CHALLENGE -> showNumberChallengeUI(push)
                PushType.DRY       -> { /* test push — no user action required */ }
            }
        }
    }
}
A null result means the push was a silent notification that the module handled internally, and needs no action from your app. This happens when the push is a test push sent during device registration or pairing: the module completes the registration and never delivers a PushNotification object to your app.
The PushNotification object provides the fields and methods your app works with:
| Field or method | Type | Description |
|---|---|---|
|
|
Approves the push authentication request. Pass the challenge number for number-matching pushes, |
|
|
Denies the push authentication request. |
|
String |
Unique identifier for the push request. |
|
Boolean |
Returns |
|
IntArray? |
The numbers to display for number matching. Null when the policy expects the user to enter the number manually. |
|
|
The type of push: |
|
String? |
Notification title extracted from the FCM payload. |
|
String? |
Notification body extracted from the FCM payload. |
The type of push determines what your app shows the user:
DEFAULT-
A standard authentication request that the user approves or denies with a single tap.
CHALLENGE-
Uses number matching, where the user enters or selects the correct number before the authentication completes.
DRY-
A test push that verifies push registration, delivered to your app as a
PushNotificationwhen the push is processed through the normal path described above, rather than during pairing. No user action is required, so your app can safely ignore it.
Handling a DEFAULT push
A DEFAULT push carries the notification title and message from the PushNotification object. Show the approve and deny options to the user, for example as buttons in your app or as actions on the system notification banner:
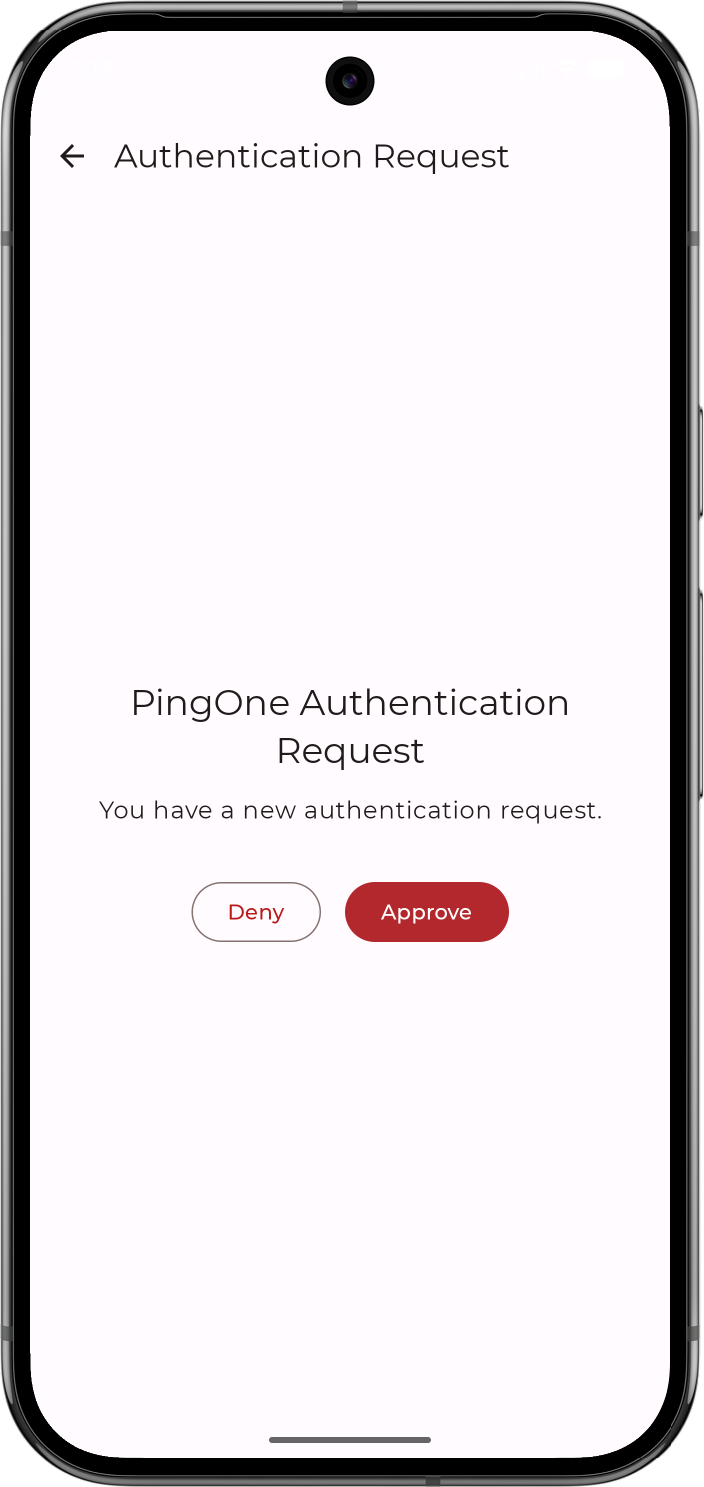
default push authentication requestIf the user approves, call approveNotification on the PushNotification object. This completes the authentication: the DaVinci flow on the accessing device is waiting on the device authentication transaction, and it resumes as soon as PingOne records the response.
The call takes an authenticationMethod value that records how the user verified themselves in your app; pass "user" when the user simply tapped a button, or "biometric" if your app gated the approval behind a biometric prompt.
For DEFAULT pushes, pass null as numberChallenge:
push.approveNotification(
    context = applicationContext,
    authenticationMethod = "user", // or "biometric", depending on your UI
    numberChallenge = null
).onSuccess { /* the sign-on continues on the accessing device */ }
If the user denies, call denyNotification. The sign-on on the accessing device fails, and the DaVinci flow continues down its failure path:
push.denyNotification(applicationContext)
    .onSuccess { /* the sign-on on the accessing device fails */ }
Both functions suspend and return a Result<Unit>. A successful result means PingOne recorded the response, not that the user authenticated; the outcome of the sign-on itself is determined by the DaVinci flow on the accessing device.
Handling a CHALLENGE push
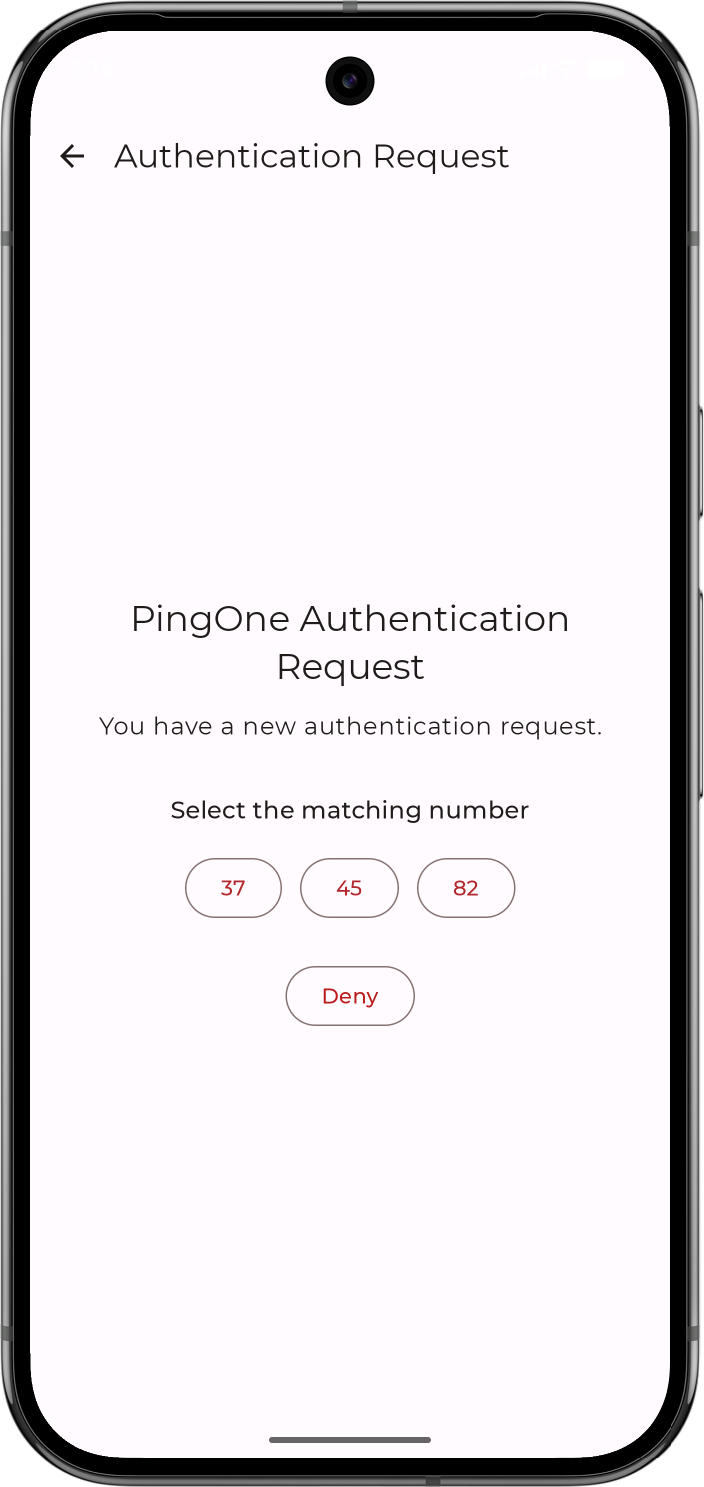
If your PingOne MFA policy uses number matching, the push type is CHALLENGE and the PushNotification object carries the challenge numbers. Use getNumbersChallenge() to get them and present them to the user:
-
If PingOne is configured so the user selects the correct number from a group of numbers displayed, the function returns the possible numbers.
-
If PingOne requires the user to type the number in, the function returns null. Your app prompts the user to enter the number displayed on the accessing device.
|
To select the type of number matching, configure the Number Matching Options property on the Mobile tab of your application in PingOne. |
val options: IntArray? = push.getNumbersChallenge()
// options is null when the application expects the user to enter the number manually
When the user selects or enters the number, pass it as numberChallenge when you call approveNotification:
push.approveNotification(
    context = applicationContext,
    authenticationMethod = "user", // or "biometric", depending on your UI
    numberChallenge = selectedNumber
).onSuccess { /* the sign-on continues on the accessing device */ }
If the user denies, call denyNotification as for a DEFAULT push. The sign-on on the accessing device fails, and the DaVinci flow continues down its failure path:
push.denyNotification(applicationContext)
    .onSuccess { /* the sign-on on the accessing device fails */ }
A successful result means PingOne recorded the response, not that the user authenticated; the outcome of the sign-on itself is determined by the DaVinci flow on the accessing device.
Handling banner actions with the app in the background
When the user taps Approve or Deny on the system notification banner while the app is in the background, your app still needs to handle the response.
Use the banner helpers, which route the network call through a foreground service and are exempt from Android’s background network restrictions. Call them from your notification action BroadcastReceiver:
PingOneMFA.approvePushNotificationFromBanner(pushNotification)
// or
PingOneMFA.denyPushNotificationFromBanner(pushNotification)
The service completes the network call asynchronously and does not surface the outcome back to the UI. If your app needs to react to the banner response, add a custom broadcast or shared state mechanism.