Step 4. Running and testing the app
PingOne Advanced Identity Cloud PingAM React Native
In this step you build and run the sample app, then authenticate as a demo user using an authentication journey.
All commands should be run from the PingSampleApp directory unless otherwise specified.
Starting the Metro bundler
Metro is the JavaScript bundler for React Native.
Start it from the PingSampleApp folder in a terminal window, and leave it running:
cd PingSampleApp
yarn start
Running on Android
Running on iOS
In a separate terminal window, make sure you are in the PingSampleApp folder, and run the app on the iOS simulator:
cd PingSampleApp
yarn ios
Xcode compiles the native layer and launches the simulator automatically. The first build takes several minutes.
Troubleshooting
How do I fix "Failed to build ios project. "xcodebuild" exited with error code '70'."?
This might be caused by the default simulator not being available as a destination for Xcode 26 from the command-line.
To work around this issue, close any open iPhone 17 simulators, and in the Simulator app, manually open an iPhone 15 or iPhone 16 simulator.
The sample app attempts to launch on a booted iOS device by default, but will start one if none are available. Leaving an iPhone 15 or 16 device running prevents the error code '70' issue in Xcode 26.
Authenticating with a journey
After launching the app, follow these steps to run an authentication journey:
-
On the home screen, scroll to and tap Configuration under the SETUP section.
-
On the Configuration page, select Journey Test Config, and then click the back arrow ()
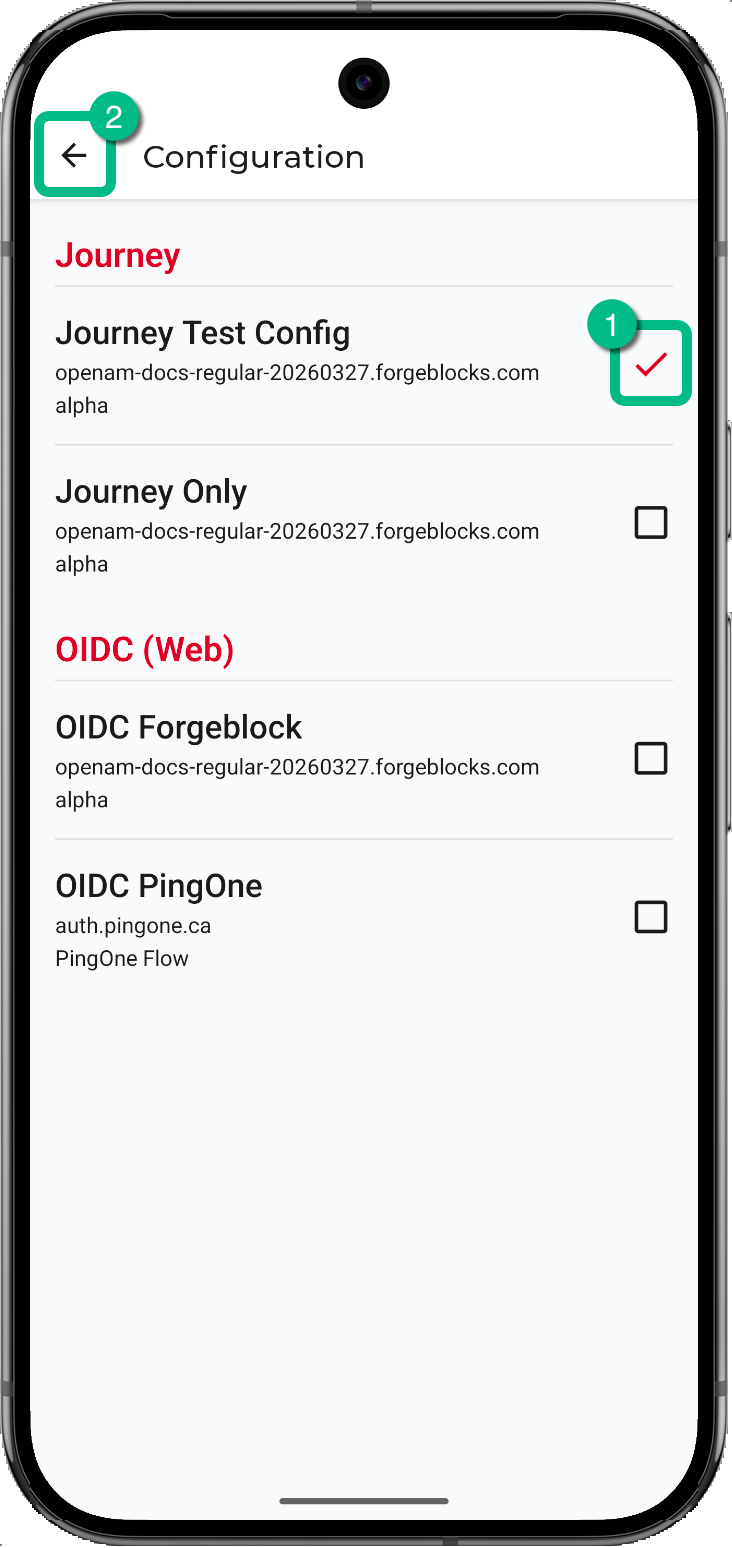 Figure 1. Selecting Journey Test Config on the Configuration page
-
-
On the home screen, tap Journey Flow under the AUTHENTICATION section.
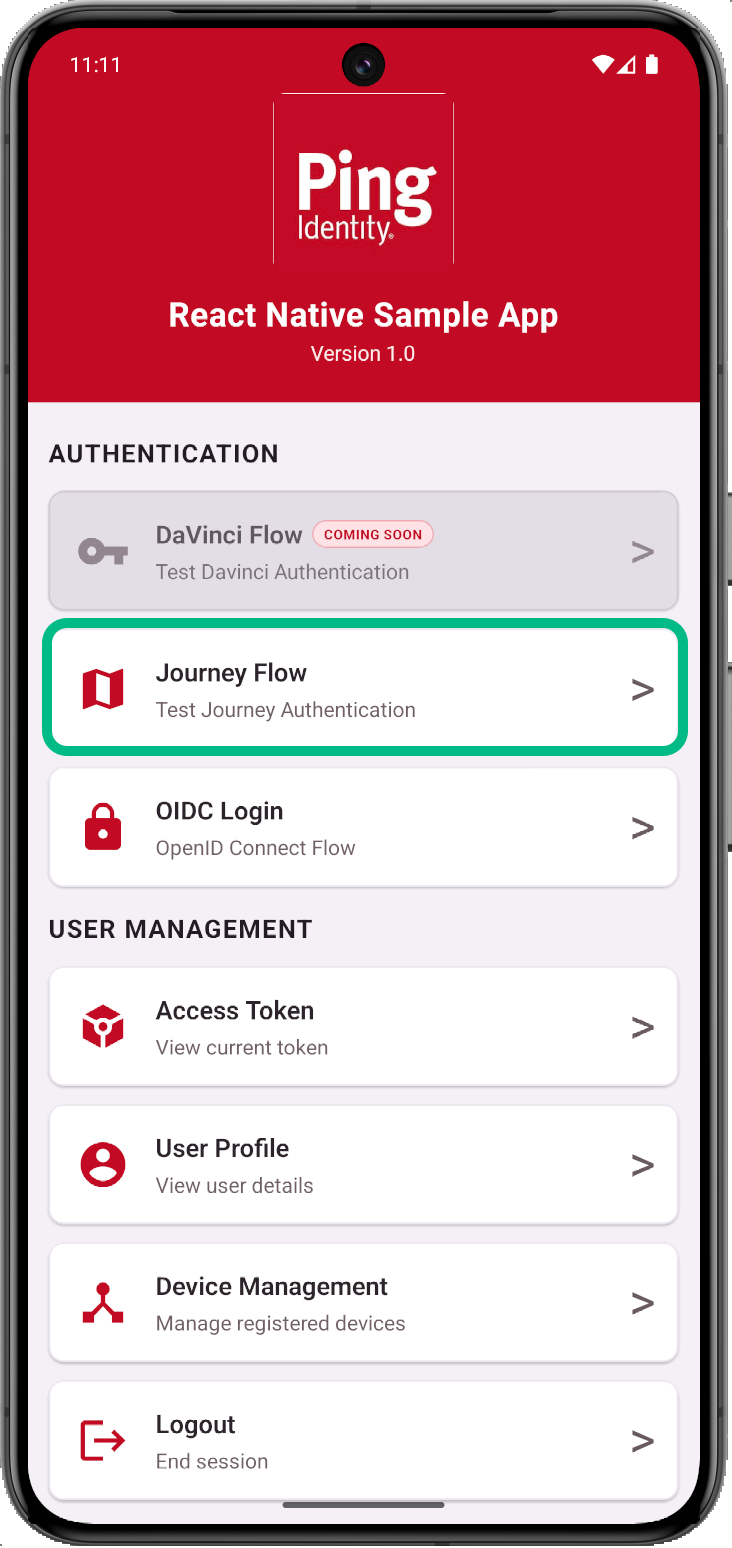 Figure 2. Starting a Journey Flow from the home screen
 -
On the Journey screen, enter the name of an authentication journey, for example
LoginorsdkUsernamePasswordJourney, and then tap Start Journey. -
When prompted, sign in as your demo user:
-
Username:
demo -
Password:
Ch4ng3it!
Depending on the journey you ran, you might see a screen with a Logout and a Continue button.
If this page appears, click the Continue button to complete the authentication journey.
After successful authentication, the app displays user info:
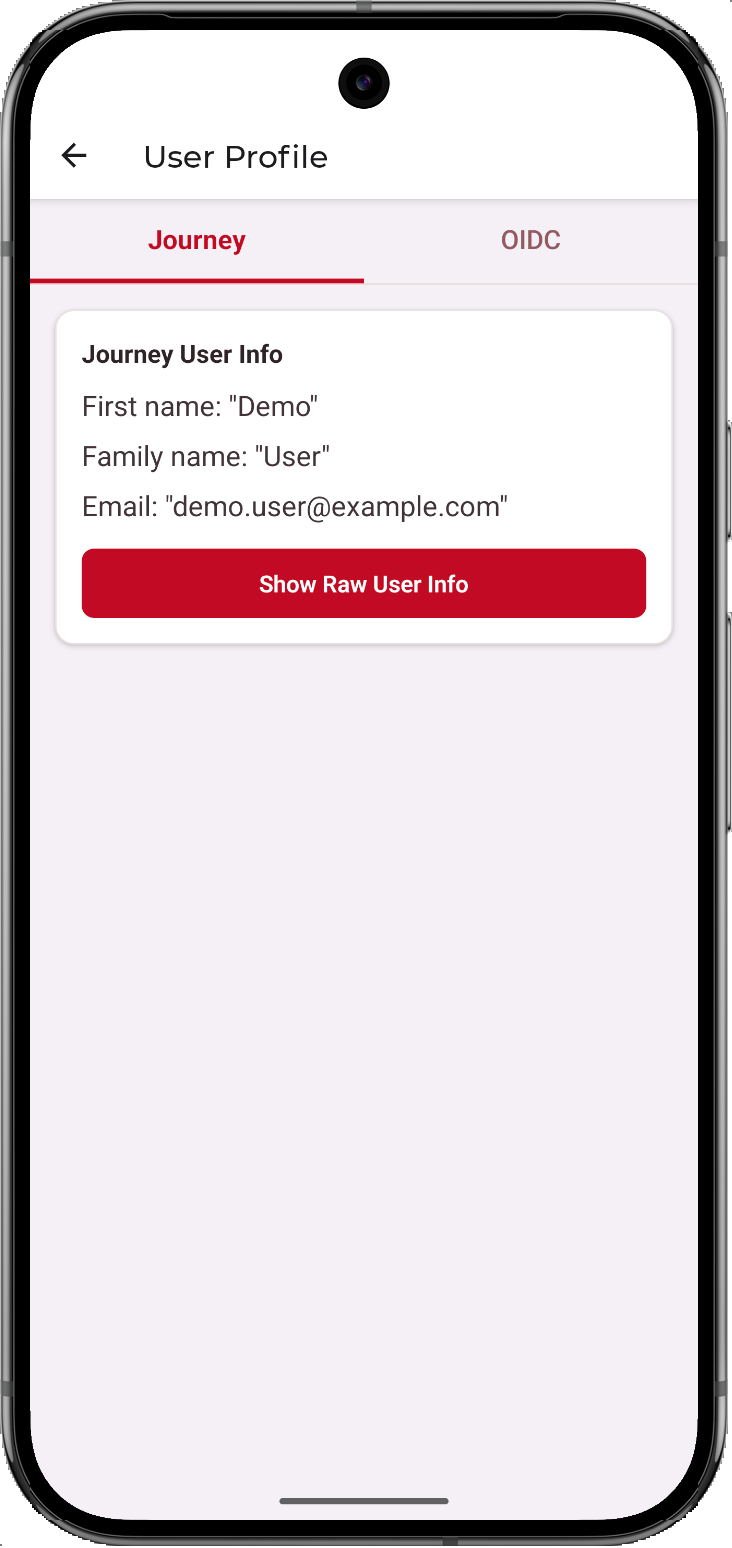 Figure 3. User info displayed after successful authentication
 -
Viewing OAuth 2.0 tokens
-
From the home screen, tap Access Token under the USER MANAGEMENT section.
-
On the Token screen, select the Journey tab, and then tap Access Token.
The screen displays the access token and OAuth 2.0 user info retrieved from the server:
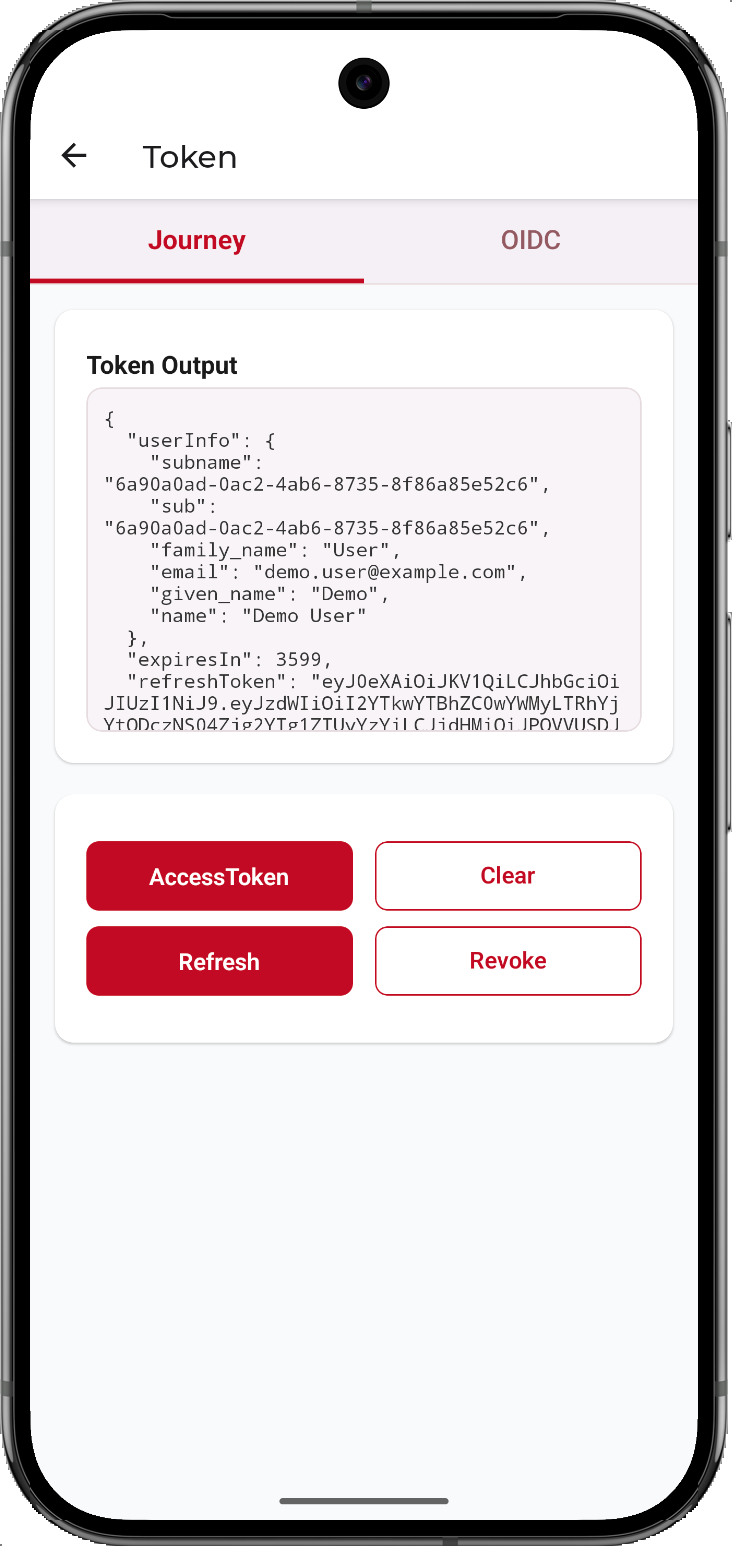 Figure 4. Access token and OAuth 2.0 user info on the Token screen
-
Signing out
-
From the home screen, tap Logout under the USER MANAGEMENT section.
The app revokes the tokens on the server and clears them from secure storage on the device.
Next steps
You have successfully run the PingSampleApp and authenticated a user through a journey.
The app also provides screens to explore Device Management, OATH tokens, Push notifications, and more, all available from the home screen.
Try authenticating with a more complex authentication journey that includes MFA functionality such as device binding or OATH passcodes, then viewing and managing the registered authenticators in the Device Management page.