Step 2. Configure connection properties
PingOne Advanced Identity Cloud PingAM Android
In this step, you configure the "kotlin-journey" sample to connect to your server.
-
In Android Studio, open the
sdk-sample-apps/android/kotlin-journeyfolder you cloned in the previous step. -
In the Project pane, switch to the Android view.
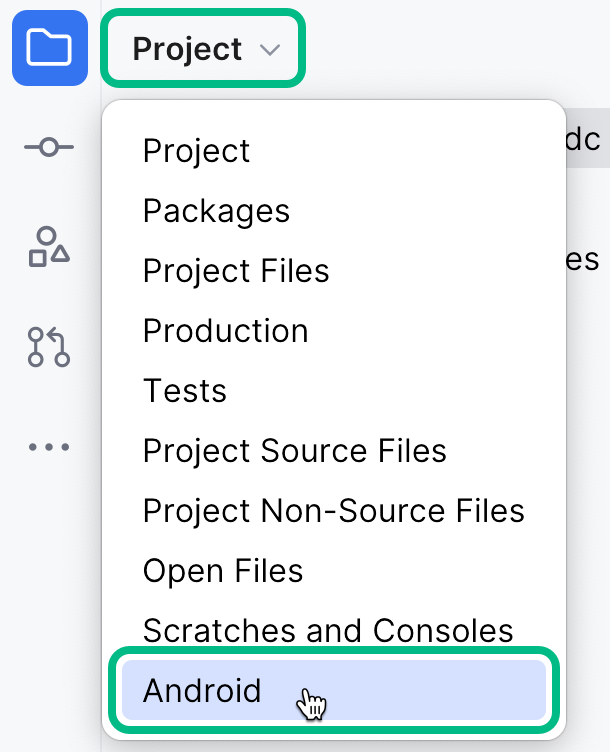 Figure 1. Switching the project pane to Android view.
 -
In the Android view, navigate to app > kotlin+java > com.pingidentity.samples.journeyapp > env, and open
EnvViewModel.kt.The file contains Journey module configuration sections for two different environments,
testConfigandprodConfig:val testConfig = Journey { logger = Logger.STANDARD serverUrl = "<Server Url>" realm = "<Realm>" cookie = "<Cookie Name>" module(Oidc) { clientId = "<Client ID" discoveryEndpoint = "<Discovery Endpoint>" scopes = mutableSetOf("<Scope1>", "<Scope2>") redirectUri = "<Redirect URI>" } } val prodConfig = Journey { logger = Logger.STANDARD serverUrl = "<Server Url>" realm = "<Realm>" cookie = "<Cookie Name>" module(Oidc) { clientId = "<Client ID" discoveryEndpoint = "<Discovery Endpoint>" scopes = mutableSetOf("<Scope1>", "<Scope2>") redirectUri = "<Redirect URI>" } } -
Update both of these configuration blocks with the details of your server environment.
You must populate both configuration blocks, but you can use identical values in each property.
- serverUrl
-
The URL of the server to connect to, including the deployment path of the Access Management component.
Identity Cloud example:
https://openam-forgerock-sdks.forgeblocks.com/amSelf-hosted example:
https://openam.example.com:8443/openam - realm
-
The realm in which the OAuth 2.0 client profile and authentication journeys are configured.
Usually,
rootfor AM andalphaorbravofor Advanced Identity Cloud. - cookie
-
The name of the cookie that contains the session token.
For example, with a self-hosted PingAM server this value might be
iPlanetDirectoryPro.PingOne Advanced Identity Cloud tenants use a random alpha-numeric string.
To locate the cookie name in an PingOne Advanced Identity Cloud tenant, navigate to Tenant settings > Global Settings, and copy the value of the Cookie property.
- clientId
-
The client ID of your OAuth 2.0 application in PingOne Advanced Identity Cloud or PingAM.
For example,
sdkPublicClient - discoveryEndpoint
-
The
.well-knownendpoint from your server.How do I find my PingOne Advanced Identity Cloud
.well-knownURL?You can view the
.well-knownendpoint for an OAuth 2.0 client in the PingOne Advanced Identity Cloud admin console:-
Log in to your PingOne Advanced Identity Cloud administration console.
-
Click Applications, and then select the OAuth 2.0 client you created earlier. For example, sdkPublicClient.
-
On the Sign On tab, in the Client Credentials section, copy the Discovery URI value.
For example,
https://openam-forgerock-sdks.forgeblocks.com/am/oauth2/alpha/.well-known/openid-configuration
If you are using a custom domain, your
.well-knownis formed as follows:https://<custom-domain-fqdn>/.well-known/openid-configurationLearn more in Access OIDC configuration discovery endpoint.
How do I find my PingAM
.well-knownURL?To form the
.well-knownURL for an PingAM server, concatenate the following information into a single URL:-
The base URL of the PingAM component of your deployment, including the port number and deployment path.
For example,
https://openam.example.com:8443/openam -
The string
/oauth2 -
The hierarchy of the realm that contains the OAuth 2.0 client.
You must specify the entire hierarchy of the realm, starting at the Top Level Realm. Prefix each realm in the hierarchy with the
realms/keyword.For example,
/realms/root/realms/customersIf you omit the realm hierarchy, the top level
ROOTrealm is used by default. -
The string
/.well-known/openid-configuration
For example,
https://openam-forgerock-sdks.forgeblocks.com/am/oauth2/realms/alpha/.well-known/openid-configuration -
- scopes
-
The scopes you added to your OAuth 2.0 application in PingOne Advanced Identity Cloud.
For example,
openid profile email address - redirectUri
-
The redirect URI or sign-in URL as configured in the OAuth 2.0 client profile.
This value must exactly match a value configured in your OAuth 2.0 client. For example,
com.example.demo://oauth2redirect.
The result will resemble the following:
Configuring the Journey module in the kotlin-journey Android appval testConfig = Journey { logger = Logger.STANDARD serverUrl = "https://openam-forgerock-sdks.forgeblocks.com/am" realm = "alpha" cookie = "ch15fefc5407912" // Oidc as module module(Oidc) { clientId = "sdkPublicClient" discoveryEndpoint = "https://openam-forgerock-sdks.forgeblocks.com/am/oauth2/realms/alpha/.well-known/openid-configuration" scopes = mutableSetOf("openid", "email", "address", "profile", "phone") redirectUri = "com.example.demo://oauth2redirect" } } val prodConfig = Journey { logger = Logger.STANDARD serverUrl = "https://openam-forgerock-sdks.forgeblocks.com/am" realm = "alpha" cookie = "ch15fefc5407912" // Oidc as module module(Oidc) { clientId = "sdkPublicClient" discoveryEndpoint = "https://openam-forgerock-sdks.forgeblocks.com/am/oauth2/realms/alpha/.well-known/openid-configuration" scopes = mutableSetOf("openid", "email", "address", "profile", "phone") redirectUri = "com.example.demo://oauth2redirect" } } -
In the Android view, navigate to app > kotlin+java > com.pingidentity.samples.journeyapp > userprofile, and open
UserProfileViewModel.kt.At the end of this file there is a Device Client module configuration section, so that the app can list and manage registered devices:
return DeviceClient { ssoTokenString = user.session().value serverUrl = URL("https://openam-sdks.forgeblocks.com/am") realm = user.session().realm cookieName = "5421aeddf91aa20" logger = Logger.STANDARD } -
Update the values in the Device Client configuration block with the details of your server environment.
- serverUrl
-
The URL of the server to connect to, including the deployment path of the Access Management component.
Identity Cloud example:
https://openam-forgerock-sdks.forgeblocks.com/amSelf-hosted example:
https://openam.example.com:8443/openam - cookieName
-
The name of the cookie that contains the session token.
For example, with a self-hosted PingAM server this value might be
iPlanetDirectoryPro.PingOne Advanced Identity Cloud tenants use a random alpha-numeric string.
To locate the cookie name in an PingOne Advanced Identity Cloud tenant, navigate to Tenant settings > Global Settings, and copy the value of the Cookie property.
The result will resemble the following:
Configuring a device client in the kotlin-journey Android appreturn DeviceClient { ssoTokenString = user.session().value serverUrl = URL("https://openam-forgerock-sdks.forgeblocks.com/am") realm = user.session().realm cookieName = "ch15fefc5407912" logger = Logger.STANDARD } -
Save your changes.
With the sample configured, you can proceed to Step 3. Test the app.