Step 2. Configuring AWS for Push notifications on Android
PingOne Advanced Identity Cloud PingAM Android
In this step, you use the service account and key created in the previous steps to set up Amazon Simple Notification Service (SNS) to be able to route push notification messages to Android devices.
You also create a service account and associated access token to provide access to the service to your server.
Setting up AWS for Android push notifications
-
Log in to the AWS console: https://console.aws.amazon.com/console/home
-
In the search bar, enter
SNS, and then select Simple Notification Service from the list of results.Click the star icon () to pin the service to the toolbar in the AWS console. -
In the left menu, navigate to .
-
In the Platform applications panel, click Create platform application.
-
On the Create platform application page:
-
In Application name, enter a name for the platform application.
For example,
Android_Push_Messaging. -
In Push notification platform, select Firebase Cloud Messaging (FCM).
The page displays the Firebase credentials section.
-
In Firebase credentials, click Choose file, and navigate to the JSON file that you downloaded from Firebase when you created a Firebase key previously.
-
Click Create platform application.
The page creates the application and displays the details pane:
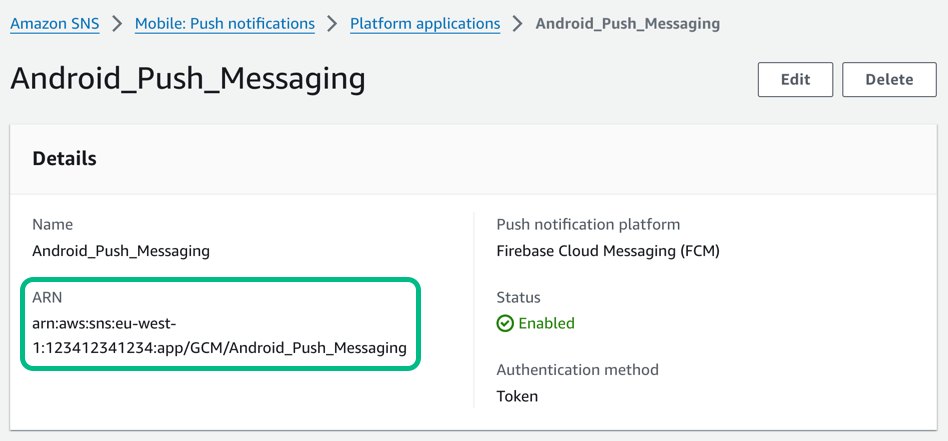 Figure 1. An Android platform application in AWS, showing the ARN.
-
-
Make a note of the ARN value. You need this value in Step 3. Configuring servers for push notifications.
Creating a service account with access to the ARN endpoints
-
Log in to the AWS console: https://console.aws.amazon.com/console/home
-
In the search bar, enter
IAM, and then select IAM from the list of results.Click the star icon () to pin the service to the toolbar in the AWS console. -
In the left menu, navigate to .
-
Click Create user.
-
In User name, enter a name for the user account that the access key will represent.
For example,
sns_arn_user. -
Click Next.
-
In Permissions options, select Attach policies directly.
The page displays additional fields.
-
In Permissions policies, in the search bar, enter
SNSFull, and then select the checkbox next toAmazonSNSFullAccess.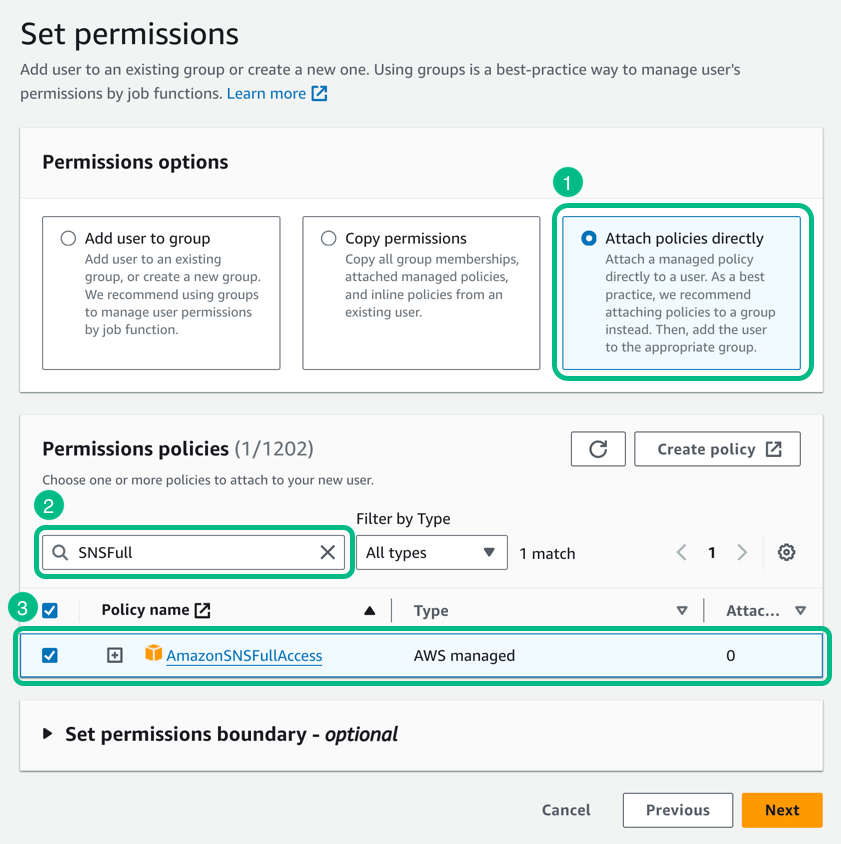 Figure 2. Adding the SNS permission policy to a user in AWS IAM.
 -
Click Next, review the details of the account, and then click Create user.
Creating an access token for the AWS service account
-
Log in to the AWS console: https://console.aws.amazon.com/console/home
-
In the search bar, enter
IAM, and then select IAM from the list of results.Click the star icon () to pin the service to the toolbar in the AWS console. -
In the left menu, navigate to , and then click the service account you created previously.
-
In the Summary pane, click Create access key.
-
On the Access key best practices & alternatives page:
-
In Use case, select Third-party service
-
Under Confirmation, select the I understand the above recommendation and want to proceed to create an access key checkbox.
-
Click Next.
-
-
In Description tag value, enter the purpose of the access key.
For example,
server access to SNS ARN endpoints -
Click Create access key.
-
Make a note of the provided values:
-
Access Key ID.
For example,
AKIAXOSPRCH15LEES -
Secret access key.
For example,
9eF7EcWMZzChI51BBHkLeElXk8R3XHv7/n7QSiwoUFJ
Click Download .csv file to download a file containing the values for safe-keeping. -
-
Click Done.