Step 2. Configure connection properties
PingOne React Native
In this step, you install the project dependencies and configure the reactnative-oidc sample to connect to the OAuth 2.0 application you created in PingOne.
|
Run all the commands on this page from the sample app’s project root folder, |
Installing dependencies
-
Install the JavaScript dependencies:
yarn install -
iOS only, install the native CocoaPods dependencies:
cd ios bundle install bundle exec pod install cd .. -
On Android only, configure a keystore and add the passwords as follows:
-
Generate a debug signing keystore:
keytool -genkeypair -v \
  -keystore android/app/debug.keystore \
  -alias androiddebugkey \
  -keyalg RSA -keysize 2048 -validity 10000 \
  -storepass 5tr0ngP@S5w0rd! -keypass 5tr0ngP@S5w0rd! \
  -dname "CN=Android Debug,O=Android,C=US"
Replace 5tr0ngP@S5w0rd! with a password of your choice, using the same value for both the
-storepassand-keypassparameters.The generated keystore file must be located in
sdk-sample-apps/reactnative/reactnative-oidc/android/app/debug.keystore, and use the aliasandroiddebugkey.The build will fail if the keystore file is missing, or if the passwords in your Gradle properties do not match those used when generating the keystore.
-
Add the keystore credentials to your global Gradle properties file, for example at
~/.gradle/gradle.properties:KEYSTORE_PASSWORD=5tr0ngP@S5w0rd! KEY_PASSWORD=5tr0ngP@S5w0rd!
-
Configuring connection properties
-
Copy the example environment file:
cp .env.example .env -
Open
.envin a text editor and update thePINGONE_values to match your environment:Example values in the .env filePINGONE_CLIENT_ID=6c7eb89a-66e9-ab12-cd34-eeaf795650b2 PINGONE_DISCOVERY_ENDPOINT=https://auth.pingone.com/3072206d-c6ce-ch15-m0nd-f87e972c7cc3/as/.well-known/openid-configuration PINGONE_REDIRECT_URI=org.forgerock.oidc://oauth2redirect PINGONE_SCOPES=openid, email, address, profile PINGONE_ACR_VALUES=- PINGONE_CLIENT_ID
-
The client ID from your OAuth 2.0 application in PingOne.
For example,
6c7eb89a-66e9-ab12-cd34-eeaf795650b2You must specify the client ID value, such as
6c7eb89a-66e9-ab12-cd34-eeaf795650b2.Do not enter the application name, such as
sdkNativeClient. - PINGONE_DISCOVERY_ENDPOINT
-
The
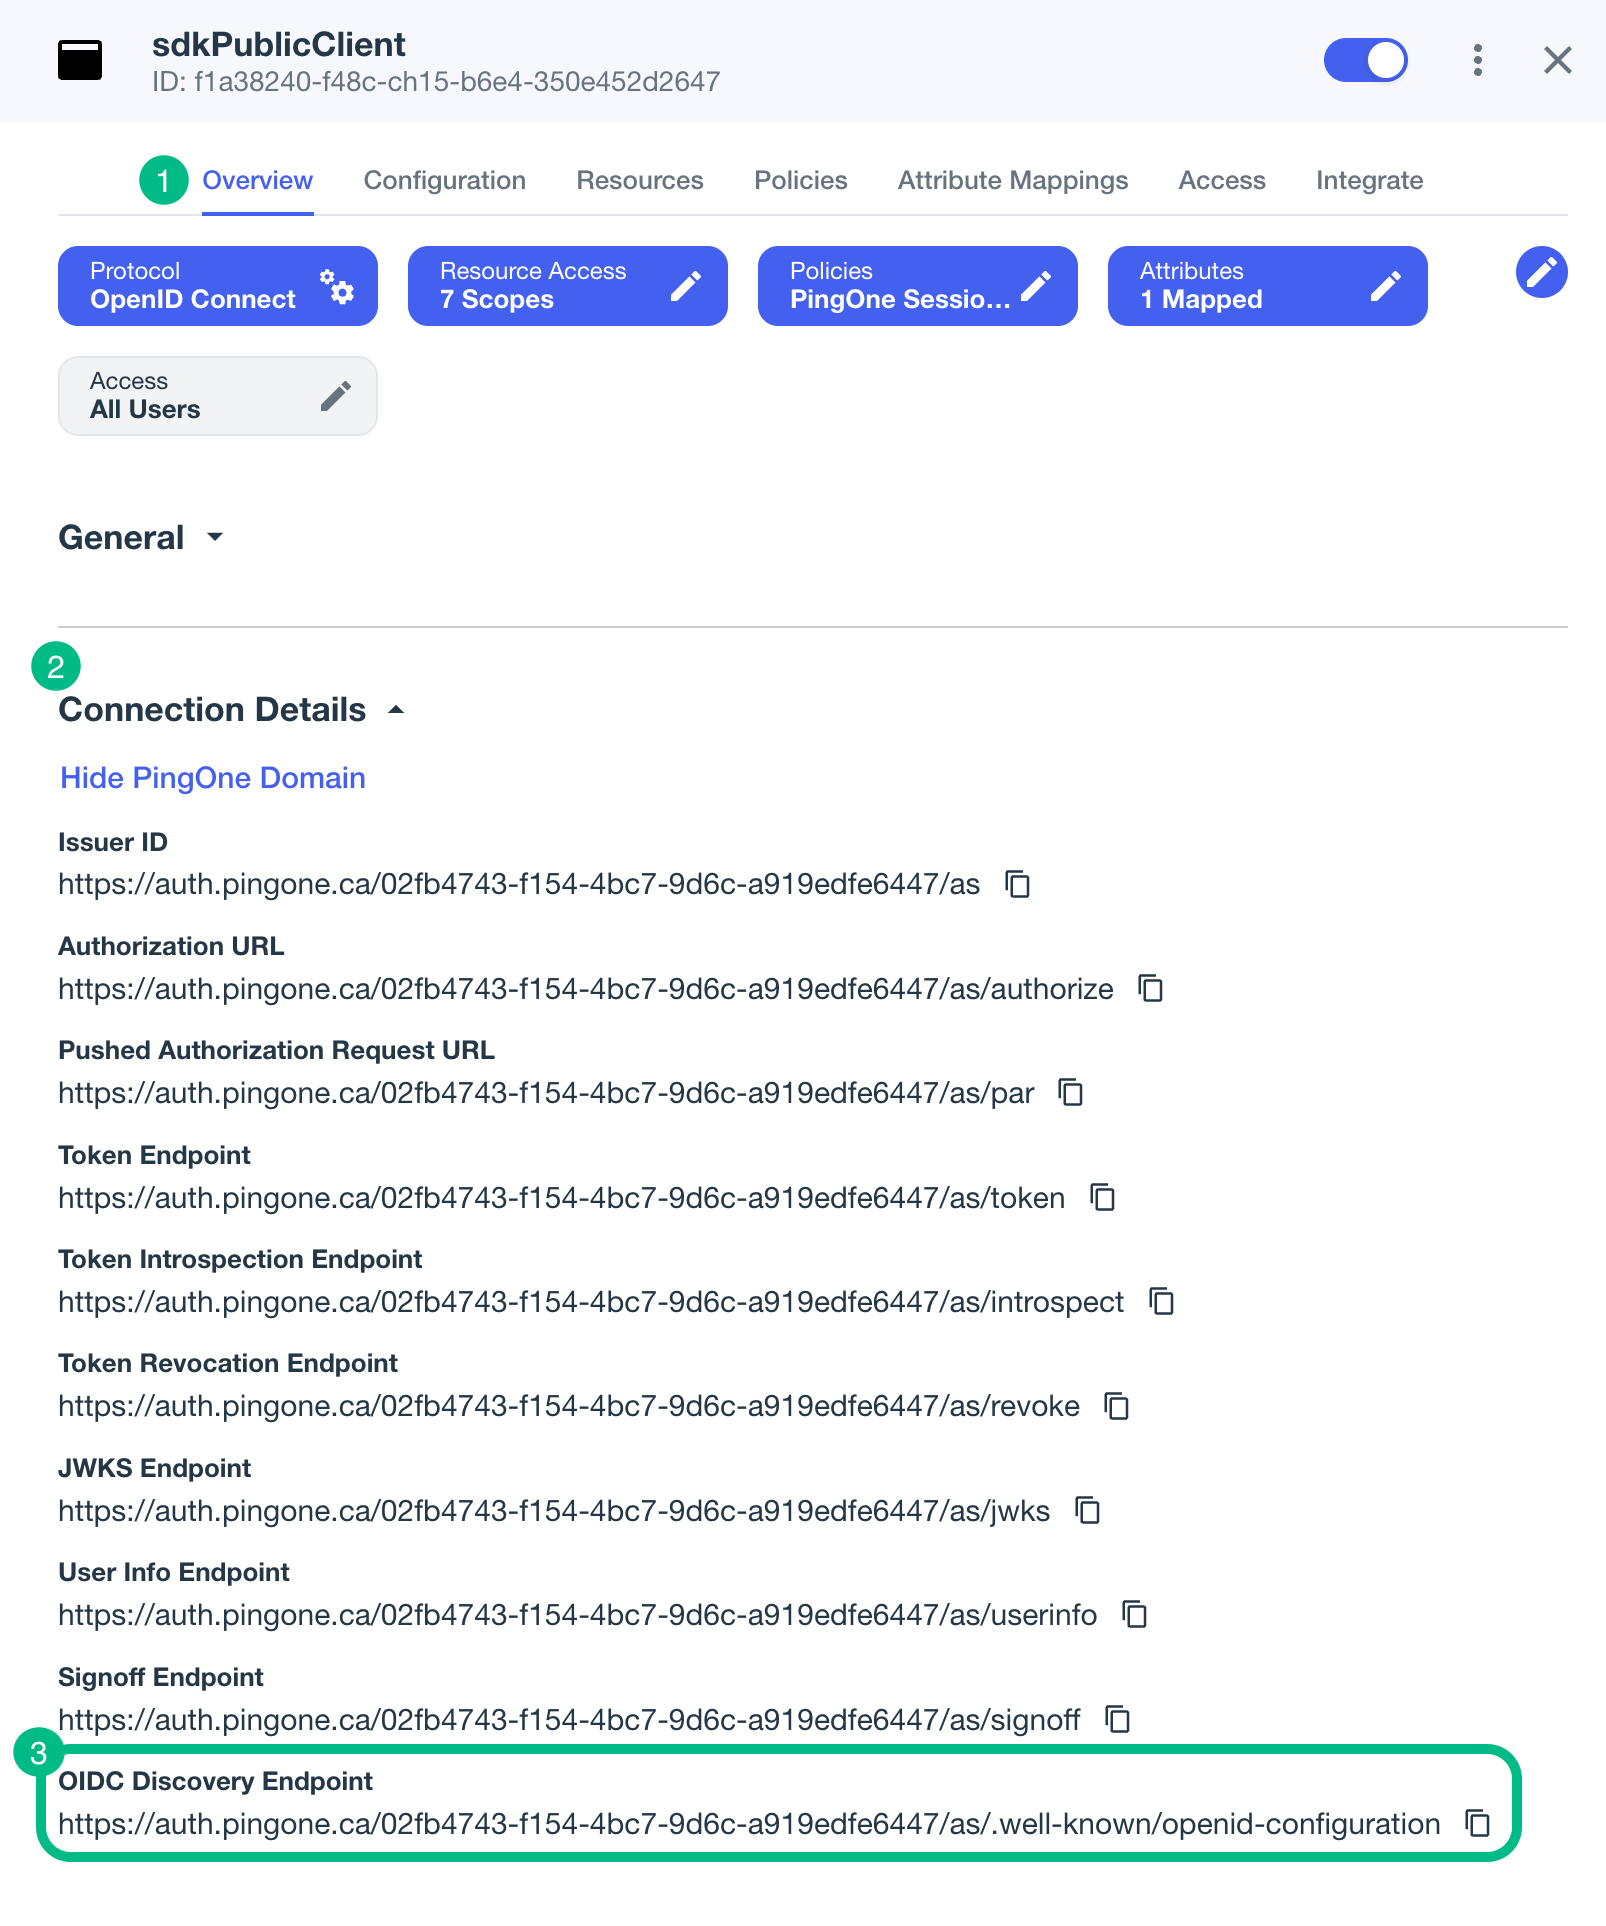
.well-knownendpoint from your PingOne tenant.How do I find my PingOne .well-known URL?
To find the
.well-knownendpoint for an OAuth 2.0 client in PingOne:-
Log in to your PingOne administration console.
-
Go to Applications > Applications, and then select your OAuth 2.0 client.
For example, sdkPublicClient.
-
On the Overview tab, expand the Connection Details section, and then copy the OIDC Discovery Endpoint value.
-
- PINGONE_REDIRECT_URI
-
The redirect URI configured in your OAuth 2.0 client profile.
This value must exactly match a redirect URI registered in your server.
For this tutorial, the sample application is pre-configured to use the following redirect URI:
org.forgerock.oidc://oauth2redirect.If you use a different redirect scheme, you must also update the values in the following locations:
-
Android -
manifestPlaceholders["appRedirectUriScheme"]insdk-sample-apps/reactnative/reactnative-oidc/android/app/build.gradle -
iOS -
CFBundleURLSchemesinsdk-sample-apps/reactnative/reactnative-oidc/ios/PingSampleApp/Info.plist -
The OAuth 2.0 client settings in the server
-
- PINGONE_SCOPES
-
A comma-separated list of OAuth 2.0 scopes to request.
For example,
openid, email, address, profile - PINGONE_ACR_VALUES
-
Optionally, specify which of the configured policies PingOne uses to authenticate users.
Enter either a single DaVinci flow policy ID, or one or more PingOne policy names, separated by spaces.
Leave this value empty to use the environment’s default authentication policy.
-
Save your changes.
With the environment file configured, the React Native app will pick up your settings the next time you build and run it.