Step 2. Configure connection properties
PingOne Android
In this step, you configure the kotlin-oidc sample to connect to the OAuth 2.0 application you created in PingOne, using OIDC sign-on.
-
In Android Studio, open the
sdk-sample-apps/android/kotlin-oidcproject you cloned in the previous step. -
In the Project pane, switch to the Android view.
-
In the Android view, navigate to oidc > kotlin+java > com.pingidentity.samples.oidc.app, and open
CentralizeLoginViewModel.kt. -
Locate the
OidcWebClientobject and update with the values from your PingOne tenant:val web by lazy { OidcWebClient { logger = Logger.STANDARD module(Oidc) { clientId = "6c7eb89a-66e9-ab12-cd34-eeaf795650b2" discoveryEndpoint = "https://auth.pingone.com/3072206d-c6ce-ch15-m0nd-f87e972c7cc3/as/.well-known/openid-configuration" scopes = mutableSetOf("openid", "email", "address", "profile", "phone") redirectUri = "com.example.demo://oauth2redirect" } } }- clientId
-
The client ID from your OAuth 2.0 application in PingOne.
For example,
6c7eb89a-66e9-ab12-cd34-eeaf795650b2You must specify the client ID value, such as
6c7eb89a-66e9-ab12-cd34-eeaf795650b2.Do not enter the application name, such as
sdkNativeClient. - discoveryEndpoint
-
The
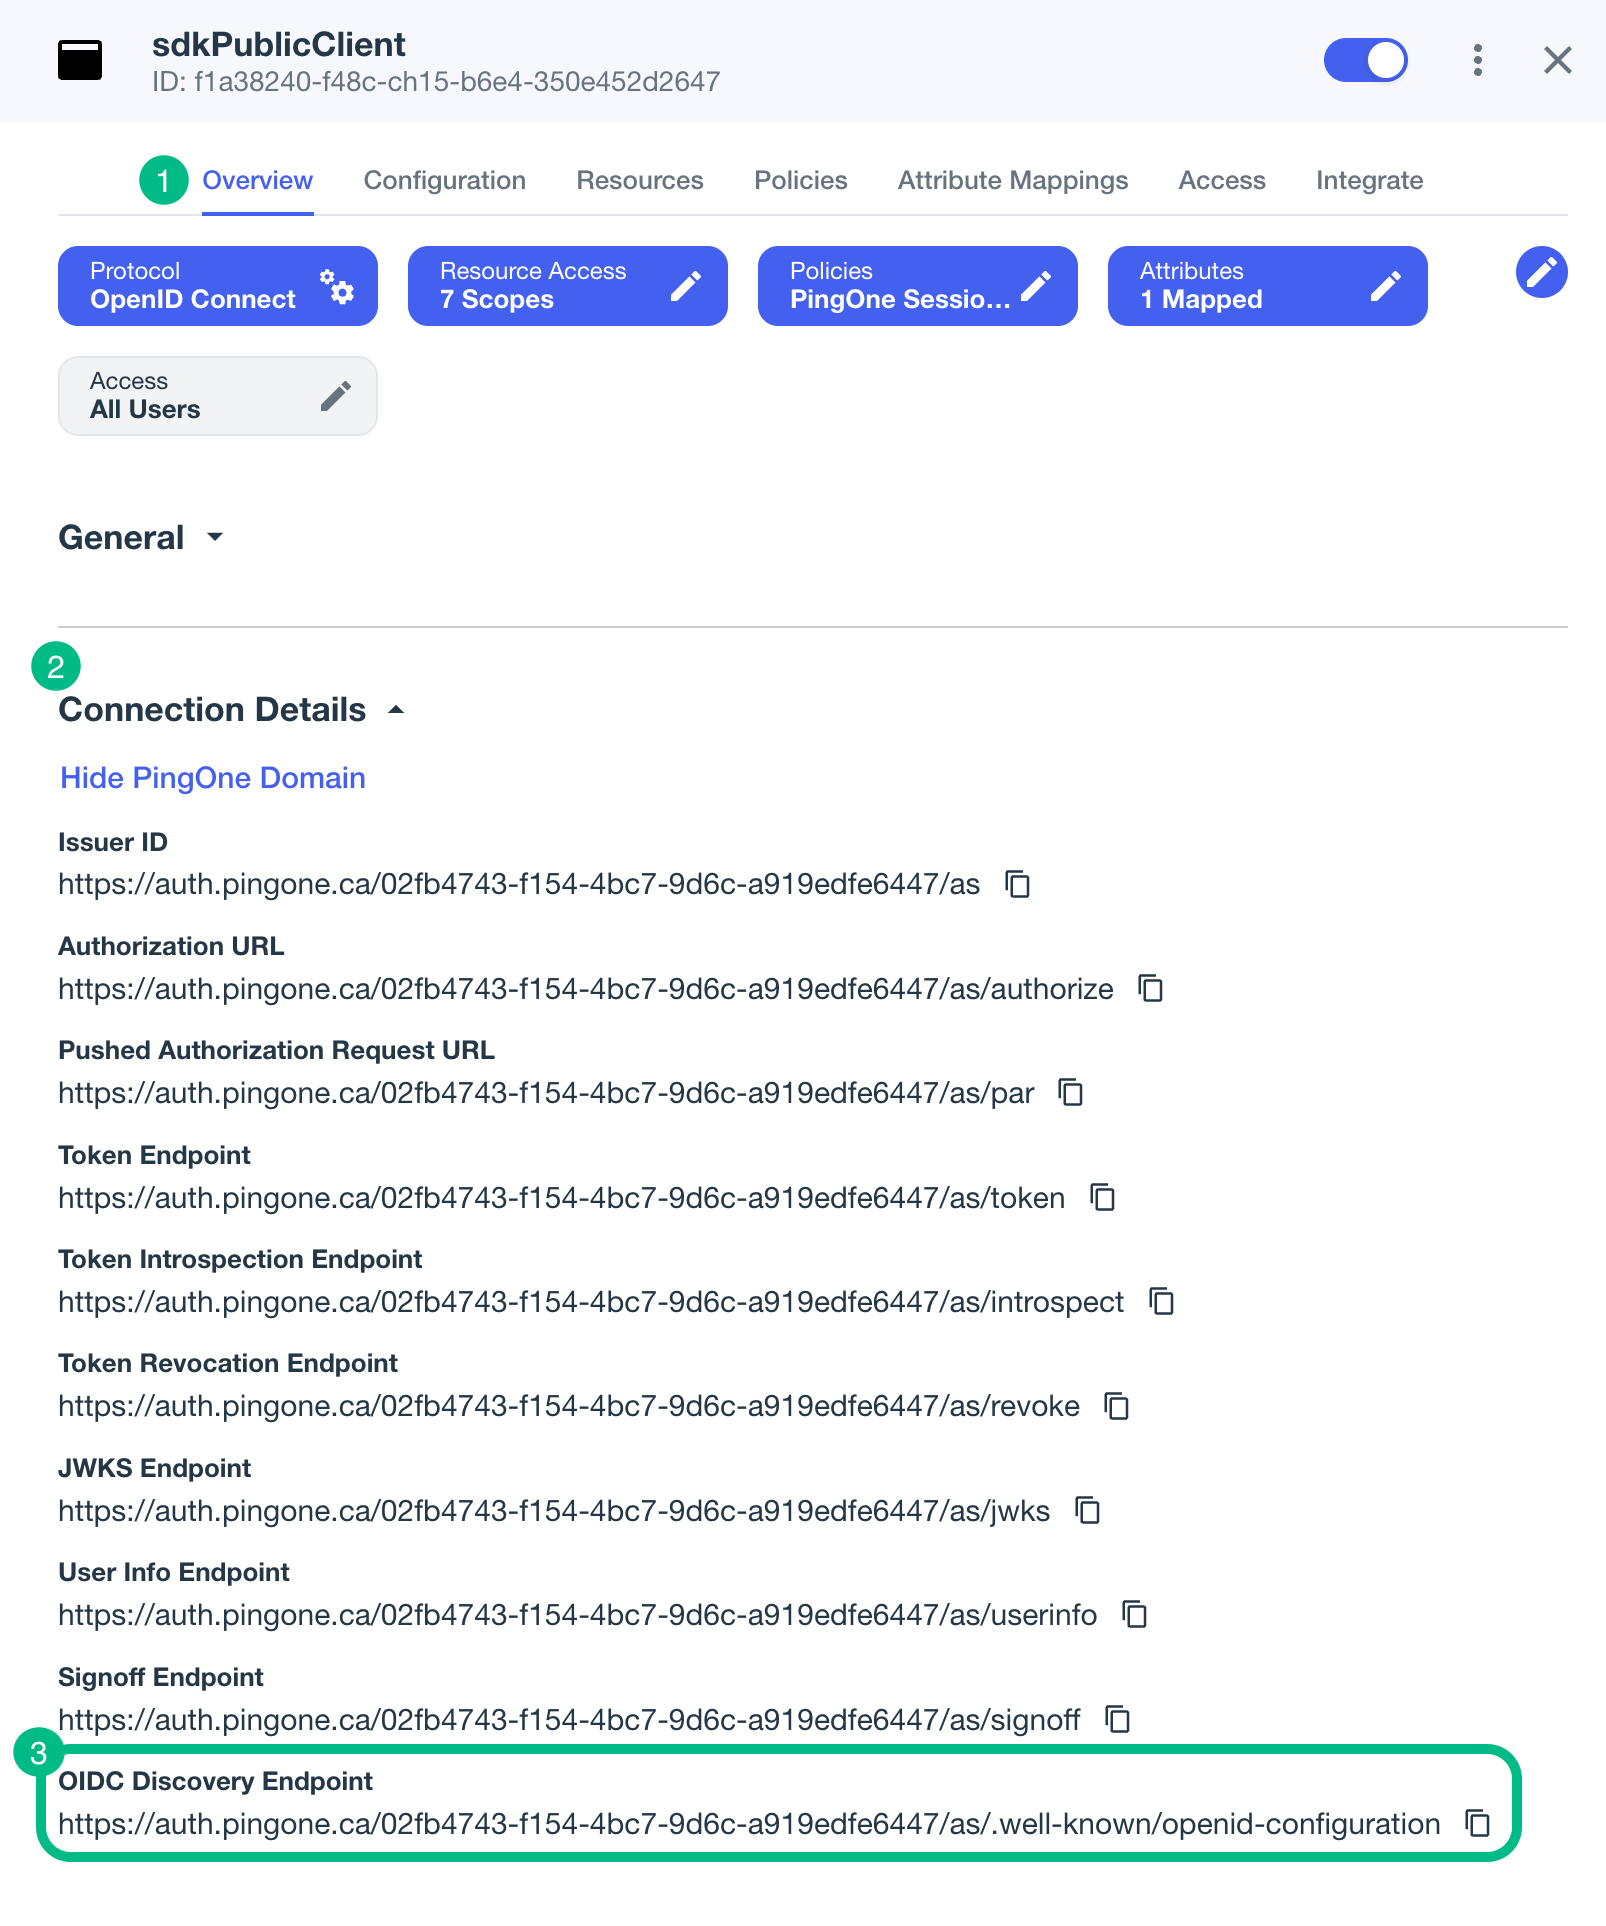
.well-knownendpoint from your PingOne tenant.How do I find my PingOne .well-known URL?
To find the
.well-knownendpoint for an OAuth 2.0 client in PingOne:-
Log in to your PingOne administration console.
-
Go to Applications > Applications, and then select your OAuth 2.0 client.
For example, sdkPublicClient.
-
On the Overview tab, expand the Connection Details section, and then copy the OIDC Discovery Endpoint value.
-
- scopes
-
The scopes you added to your OAuth 2.0 application in PingOne.
For example,
"openid", "email", "address", "profile", "phone" - redirectUri
-
The
redirect_urias configured in the OAuth 2.0 client profile.This value must exactly match a value configured in your OAuth 2.0 client.
For example,
com.example.demo://oauth2redirect
-
Save your changes.