Integrating FIDO auth journeys in JavaScript
PingOne Advanced Identity Cloud PingAM JavaScript
The FIDO module offers a streamlined API for handling FIDO interactions, including registering and authenticating with passkeys.
It abstracts away the complexities of the underlying FIDO protocols, allowing you to quickly add strong authentication to your applications.
For an example of the journeys you can build with this module, see the sample passkey journey.
Step 1. Installing modules
To add FIDO and WebAuthn capabilities to your JavaScript apps for Journeys you need to import the WebAuthn module. The WebAuthn module for JavaScript is exported as a member of the @forgerock/journey-client npm package.
Install the journey client into your JavaScript apps using npm:
npm install @forgerock/journey-client --saveStep 2. Importing the WebAuthn module
In your JavaScript app, import the WebAuthn module and step type as named imports:
import { WebAuthn, WebAuthnStepType } from '@forgerock/journey-client/webauthn';Step 3. Registering FIDO authenticators
To register a FIDO authenticator, use the register() function. Pass the step object as a parameter to the method.
The WebAuthn module leverages the WebAuthn APIs built into the browser to create a new credential. It then updates the callbacks in the step with the relevant credentials.
Return the updated step to the server by calling journeyClient.next(), and passing the step as the parameter.
const webAuthnStep = WebAuthn.getWebAuthnStepType(step);

if (webAuthnStep === WebAuthnStepType.Registration) {
    await WebAuthn.register(step);
}

// Return updated step to server to continue journey
step = await journeyClient.next(step);
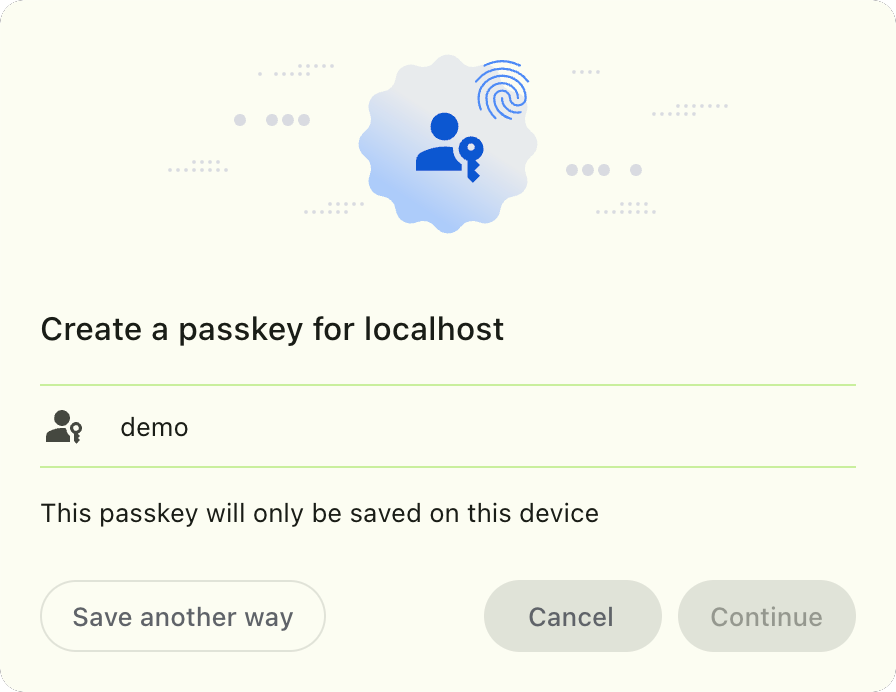
The browser displays the appropriate user interface to register a new WebAuthn credential, for example a local-only Passkey:
Step 4. Authenticating using a FIDO authenticator
To authenticate using a registered FIDO authenticator, use the authenticate() function. Pass the step object as a parameter to the method.
The WebAuthn module leverages the WebAuthn APIs built into the browser to present the available credentials, and authenticate the user. It then updates the callbacks in the step with the details from the WebAuthn authenticator.
Return the updated step to the server by calling journeyClient.next(), and passing the step as the parameter.
const webAuthnStep = WebAuthn.getWebAuthnStepType(step);

if (webAuthnStep === WebAuthnStepType.Authentication) {
    await WebAuthn.authenticate(step);
}

// Return updated step to server to continue journey
step = await journeyClient.next(step);
Step 5. Enabling passkey autofill (WebAuthn conditional UI)
Passkey autofill, also known as WebAuthn conditional UI, lets users sign in with a saved passkey directly from the browser’s autofill suggestions when they tap or click the username field, skipping the extra step of pressing a dedicated "Sign in with a passkey" button.
Conditional UI is server-driven: after you configure the journey to enable it, the metadata the server sends with the WebAuthn Authentication step tells the SDK to use conditional mediation automatically. You don’t need to change how you call WebAuthn.authenticate().
Conditional UI requires a browser that supports the WebAuthn Conditional Mediation API, such as a recent version of Chrome, Edge, Safari, or Firefox.
Your app must also be served over HTTPS in production. Browsers make an exception for localhost during development.
To add passkey autofill support to your app:
-
Add an input field for the username with
autocomplete="webauthn".The browser requires this attribute on a visible, focusable input before it will show passkey suggestions in the autofill dropdown.
Adding an autofill-eligible username field<input type="text" name="username" autocomplete="webauthn" /> -
Optionally, feature-detect conditional UI support before relying on it, and provide an
AbortSignalso you can cancel the request if the user submits the form a different way:Feature-detecting and cancelling conditional mediationconst supportsConditionalUI = await WebAuthn.isConditionalMediationSupported(); if (supportsConditionalUI) { const controller = new AbortController(); // Focus the autofill-eligible field, then start the request in the background const webAuthnStep = WebAuthn.getWebAuthnStepType(step); if (webAuthnStep === WebAuthnStepType.Authentication) { WebAuthn.authenticate(step, controller.signal) .thenupdatedStep) ⇒ journeyClient.next(updatedStep .catch((error) ⇒ { // AbortError is expected if you cancel the request yourself if (error.name !== 'AbortError') { // Handle other failures, for example fall back to a password field } }); } // Later, if the user submits a different sign-in method: // controller.abort(); }
|
If the server requests conditional mediation but the browser doesn’t support it, |