Introducing user profile self-service
PingOne Advanced Identity Cloud PingAM Android iOS JavaScript React Native
The Orchestration SDKs support many of the callbacks that authentication journeys use, including many that enable your users to manage their own profile information, such as name, address, phone numbers, and marketing preferences.
To update a user’s profile information, you must first authenticate them to get a session token.
You can then use that session token to start a new journey that allows the user to update their profile data.
Compatibility
PingIDM is responsible for profile management. Therefore you can only implement user profile self-service when using the following server environments:
-
PingOne Advanced Identity Cloud
-
PingAM and PingIDM deployed together as Ping Advanced Identity Software
-
PingAM and PingIDM deployed together by using ForgeOps
Configure the server
You must create an authentication journey that checks for a user session and then displays the user profile fields for editing. The journey must also update the profile with any changed values.
Create a user profile management journey
Follow the steps below to create a user profile management journey:
-
Create a new journey or tree, give it a name, and save your changes:
PingOne Advanced Identity Cloud
-
In your PingOne Advanced Identity Cloud tenant, navigate to Journeys, and click New Journey.
-
Enter a name, such as
sdkProfileManagement -
In Identity Object, select Alpha realm - Users.
-
Enable Run journey for all users regardless of current session.
Enabling this option in the journey means you do not have to append a parameter when starting the journey from the client.
-
Click Save.
The authentication journey designer appears.
Ping Advanced Identity Software / ForgeOps
-
Sign in to your administration console, navigate to Journeys > Journeys, and then click New Journey.
-
Enter a name, such as
sdkProfileManagement -
In Identity Object, select Users (managed/user).
-
Enable Run journey for all users regardless of current session.
Enabling this option in the journey means you do not have to append a parameter when starting the journey from the client.
-
Click Save.
The authentication journey designer appears.
-
-
Drag the following nodes into the designer area:
-
Scripted Decision - Checks for a session token and only proceeds if present.
-
Get Session Data - Gets the user identifier from the session token.
-
Attribute Collector - Displays profile attributes and allows updates.
-
Patch Object - Persists any changes/
-
-
Connect the nodes as follows:
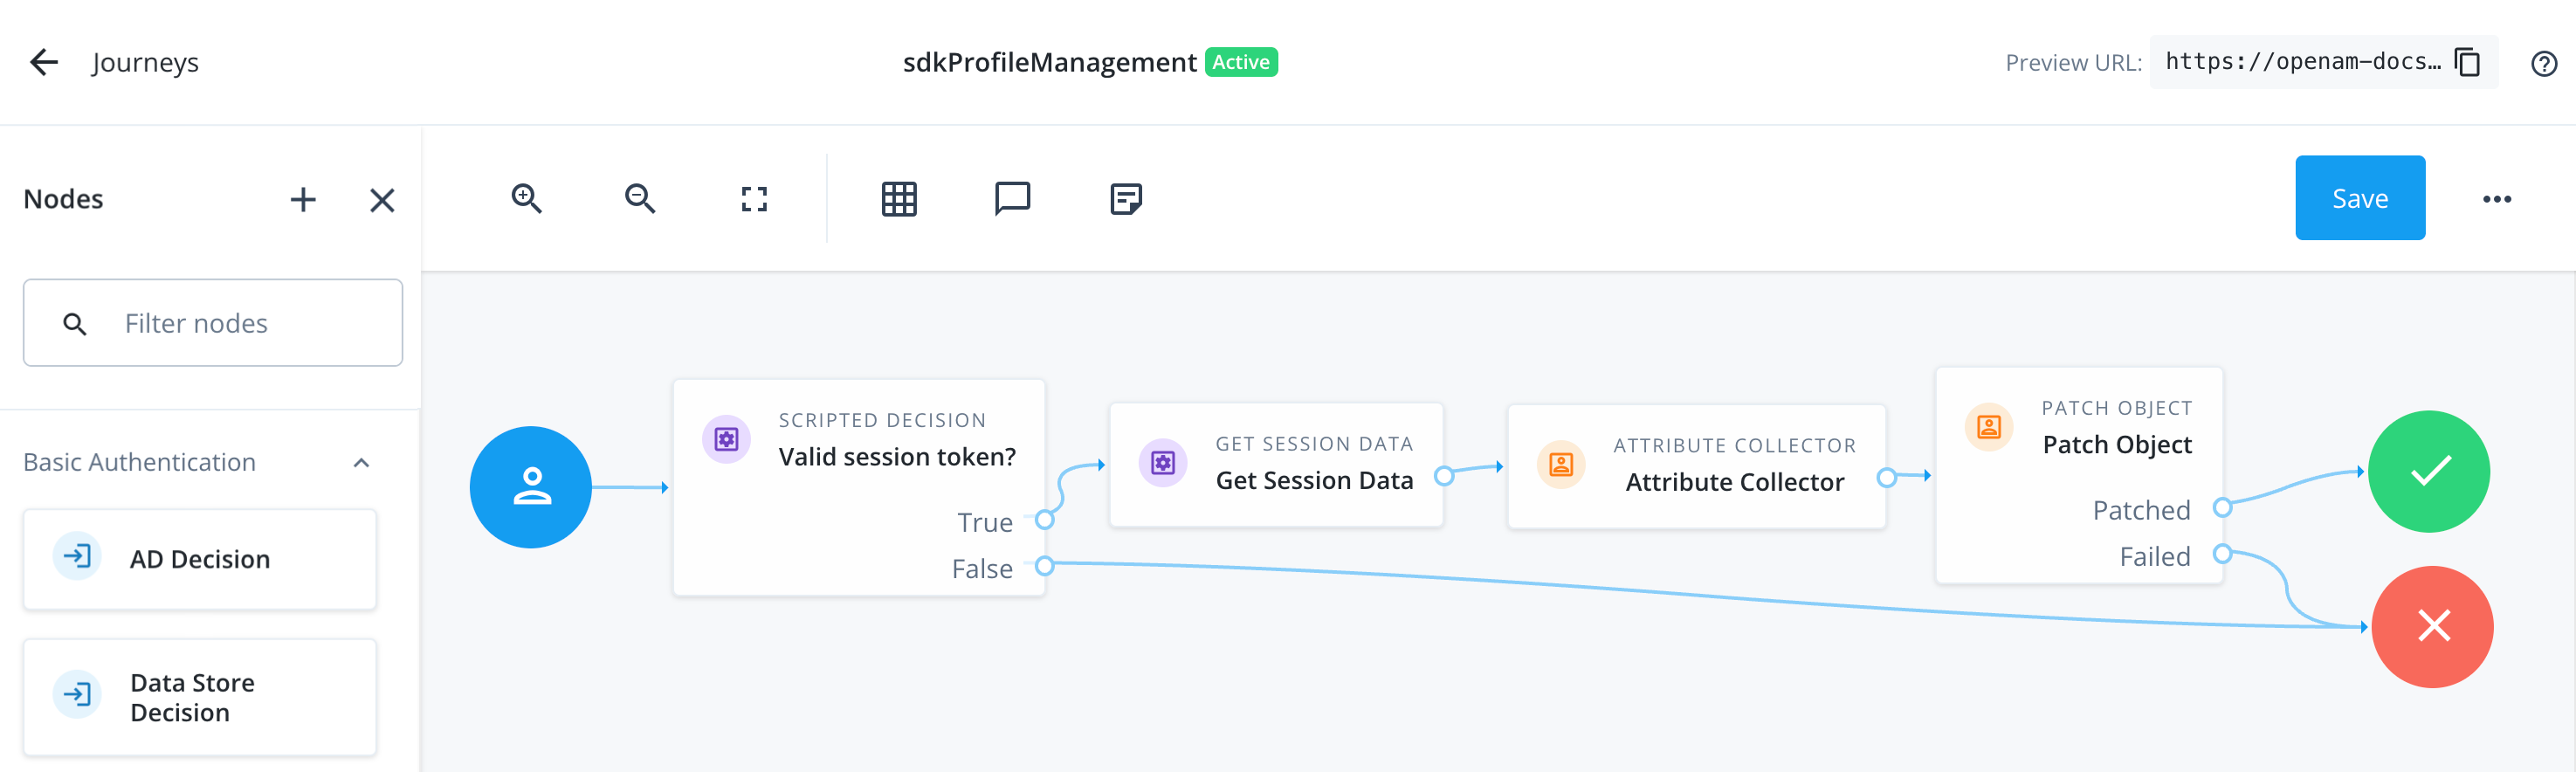 Figure 1. Example profile management authentication journey
 -
Select the Scripted Decision node.
-
Click the Script field, and then click Add ().
-
In the Choose Script Engine dialog, select Next Generation, and then click Next.
-
In Name, enter a suitable name for the script, such as
nextGenHasSession. -
In the JavaScript editor, paste the following code:
if (typeof existingSession !== 'undefined') { action.goTo("True"); } else { action.goTo("False"); } -
Click Save and Close
-
-
In Outcomes, enter the following values:
-
True -
False
The strings you enter must exactly match the parameters you used for the
action.goTo()method in the script.They are also case-sensitive.
-
-
-
Select the Get Session Data node and configure it to obtain the user’s account name from a session token.
If the Orchestration SDKs already have a session token, they automatically attach it to the call to start a new journey or tree.
-
In Session Data Key, enter
UserToken.This field is case-sensitive. The value must exactly match the name of a property in the user’s session.
For a list of properties, refer to Get Session Data node.
-
In Shared State Key, enter
userName.
The result resembles the following:
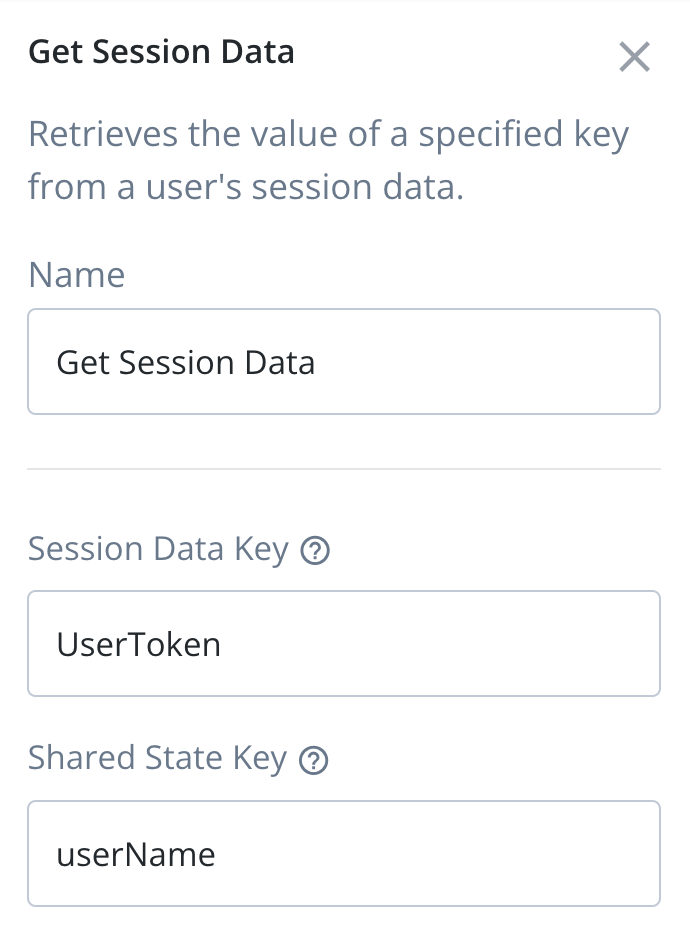 Figure 2. Configure the Get Session Data node for profile management.
 -
-
Select the Attribute Collector node and configure it with the profile attributes you want the user to view and edit:
-
In Attributes to Collect, enter the profile attributes to display. For example:
-
givenName -
sn -
mail -
telephoneNumber -
postalAddress -
city -
country -
preferences/marketing
-
-
In Identity Attribute, enter
userName.
The result resembles the following:
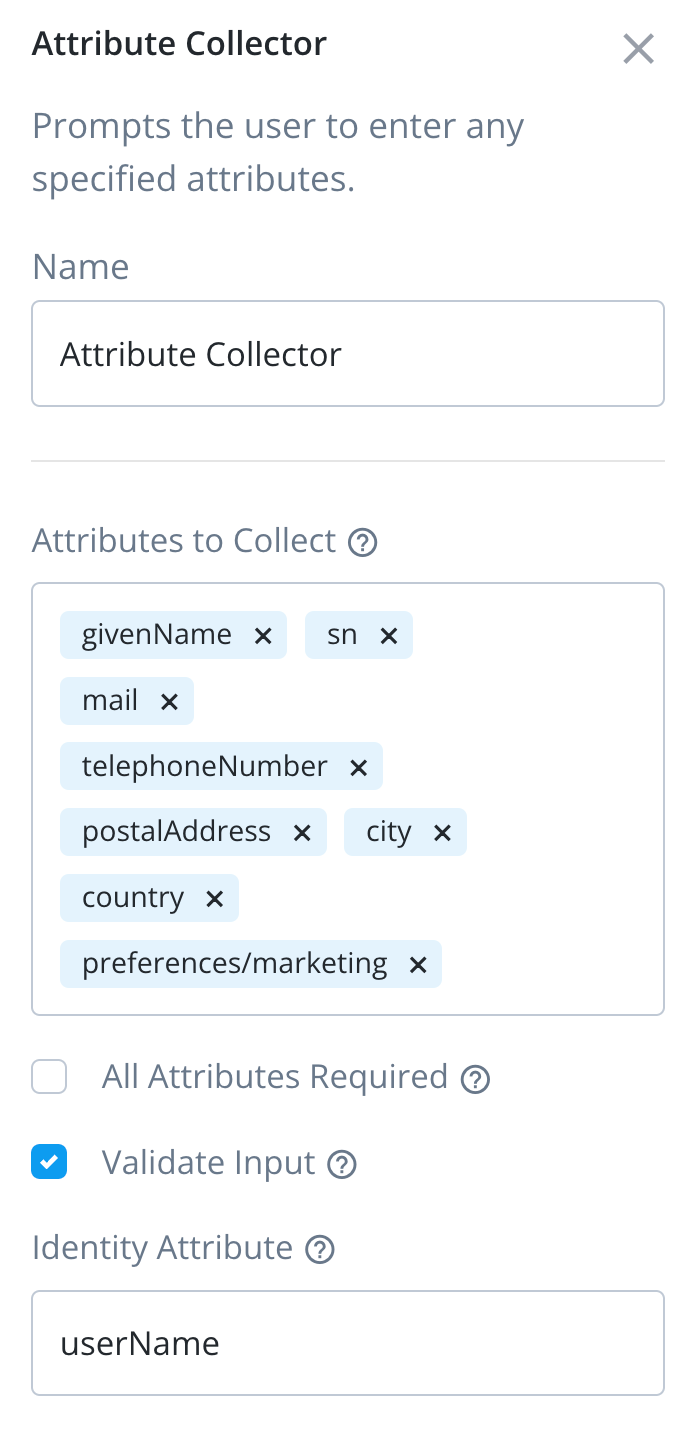 Figure 3. Configure the Attribute Collector node for profile management.
 -
-
Select the Patch Object node and configure it to update the user’s profile:
-
In Identity Resource:
-
For PingOne Advanced Identity Cloud, enter
managed/alpha_user. -
For Ping Advanced Identity Software or ForgeOps, enter
managed/user.
-
-
In Identity Attribute, enter
userName.
The result resembles the following, for an Advanced Identity Cloud deployment:
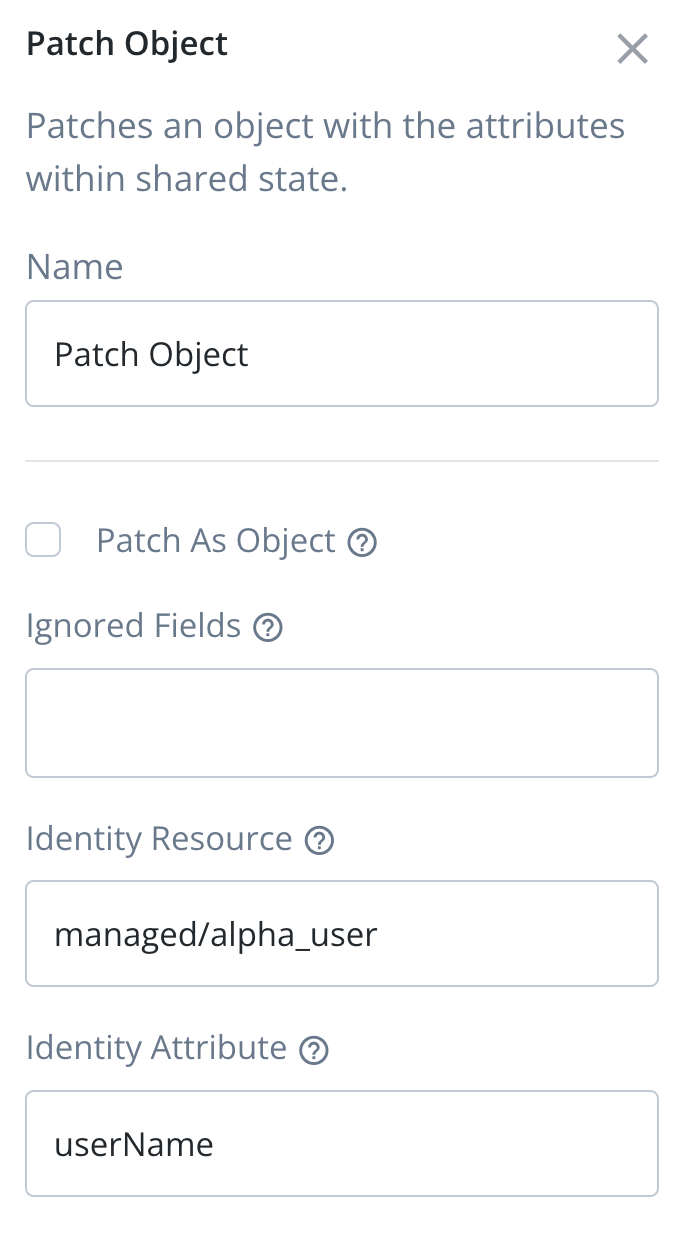 Figure 4. Configure the Patch Object node for profile management.
 -
-
Click Save.