Configuring push notifications on Android
PingOne Android
Before your Android app can receive and respond to PingOne MFA push notifications, complete the following configuration steps. Push notifications depend on configuration in Firebase, PingOne, your Android app, and DaVinci.
Step 1. Setting up Firebase Cloud Messaging
Push notifications arrive through Firebase Cloud Messaging. Setting up FCM involves two separate configurations that are easy to confuse:
-
The app-side configuration, which lets your app receive notifications. This uses a
google-services.jsonfile that you download from the Firebase console and add to your project. -
The server-side configuration, which lets PingOne send notifications to your app. This uses a Firebase service account key, which an administrator uploads to your PingOne application. It is a different file from
google-services.jsonand never goes in your app.
Creating the Firebase project and registering your app
If you already have a Firebase project for your app, skip to the next step.
-
In the Firebase console, click Add project, give the project a name, and follow the prompts to create it. You need a Google account with access to the Firebase console.
-
In the project, click the gear icon to open Project settings, then in the General tab click Add app and choose the Android icon.
-
Enter your app’s package name. This must exactly match the
applicationIdin your app’sbuild.gradle.kts; a mismatch is the most common cause of FCM setup failing with a "No matching client found for package name" build error. -
Complete the registration and download the
google-services.jsonfile. Save it in your app module’s root directory, next to the module’sbuild.gradle.kts:
your-app/
    app/
        build.gradle.kts
        google-services.json   // here
build.gradle.kts|
You can download the On the Firebase console, select your project to open its overview page. In the left menu, select Settings > General, and on the General tab, scroll to the Your apps section, which contains a link to download a copy of your 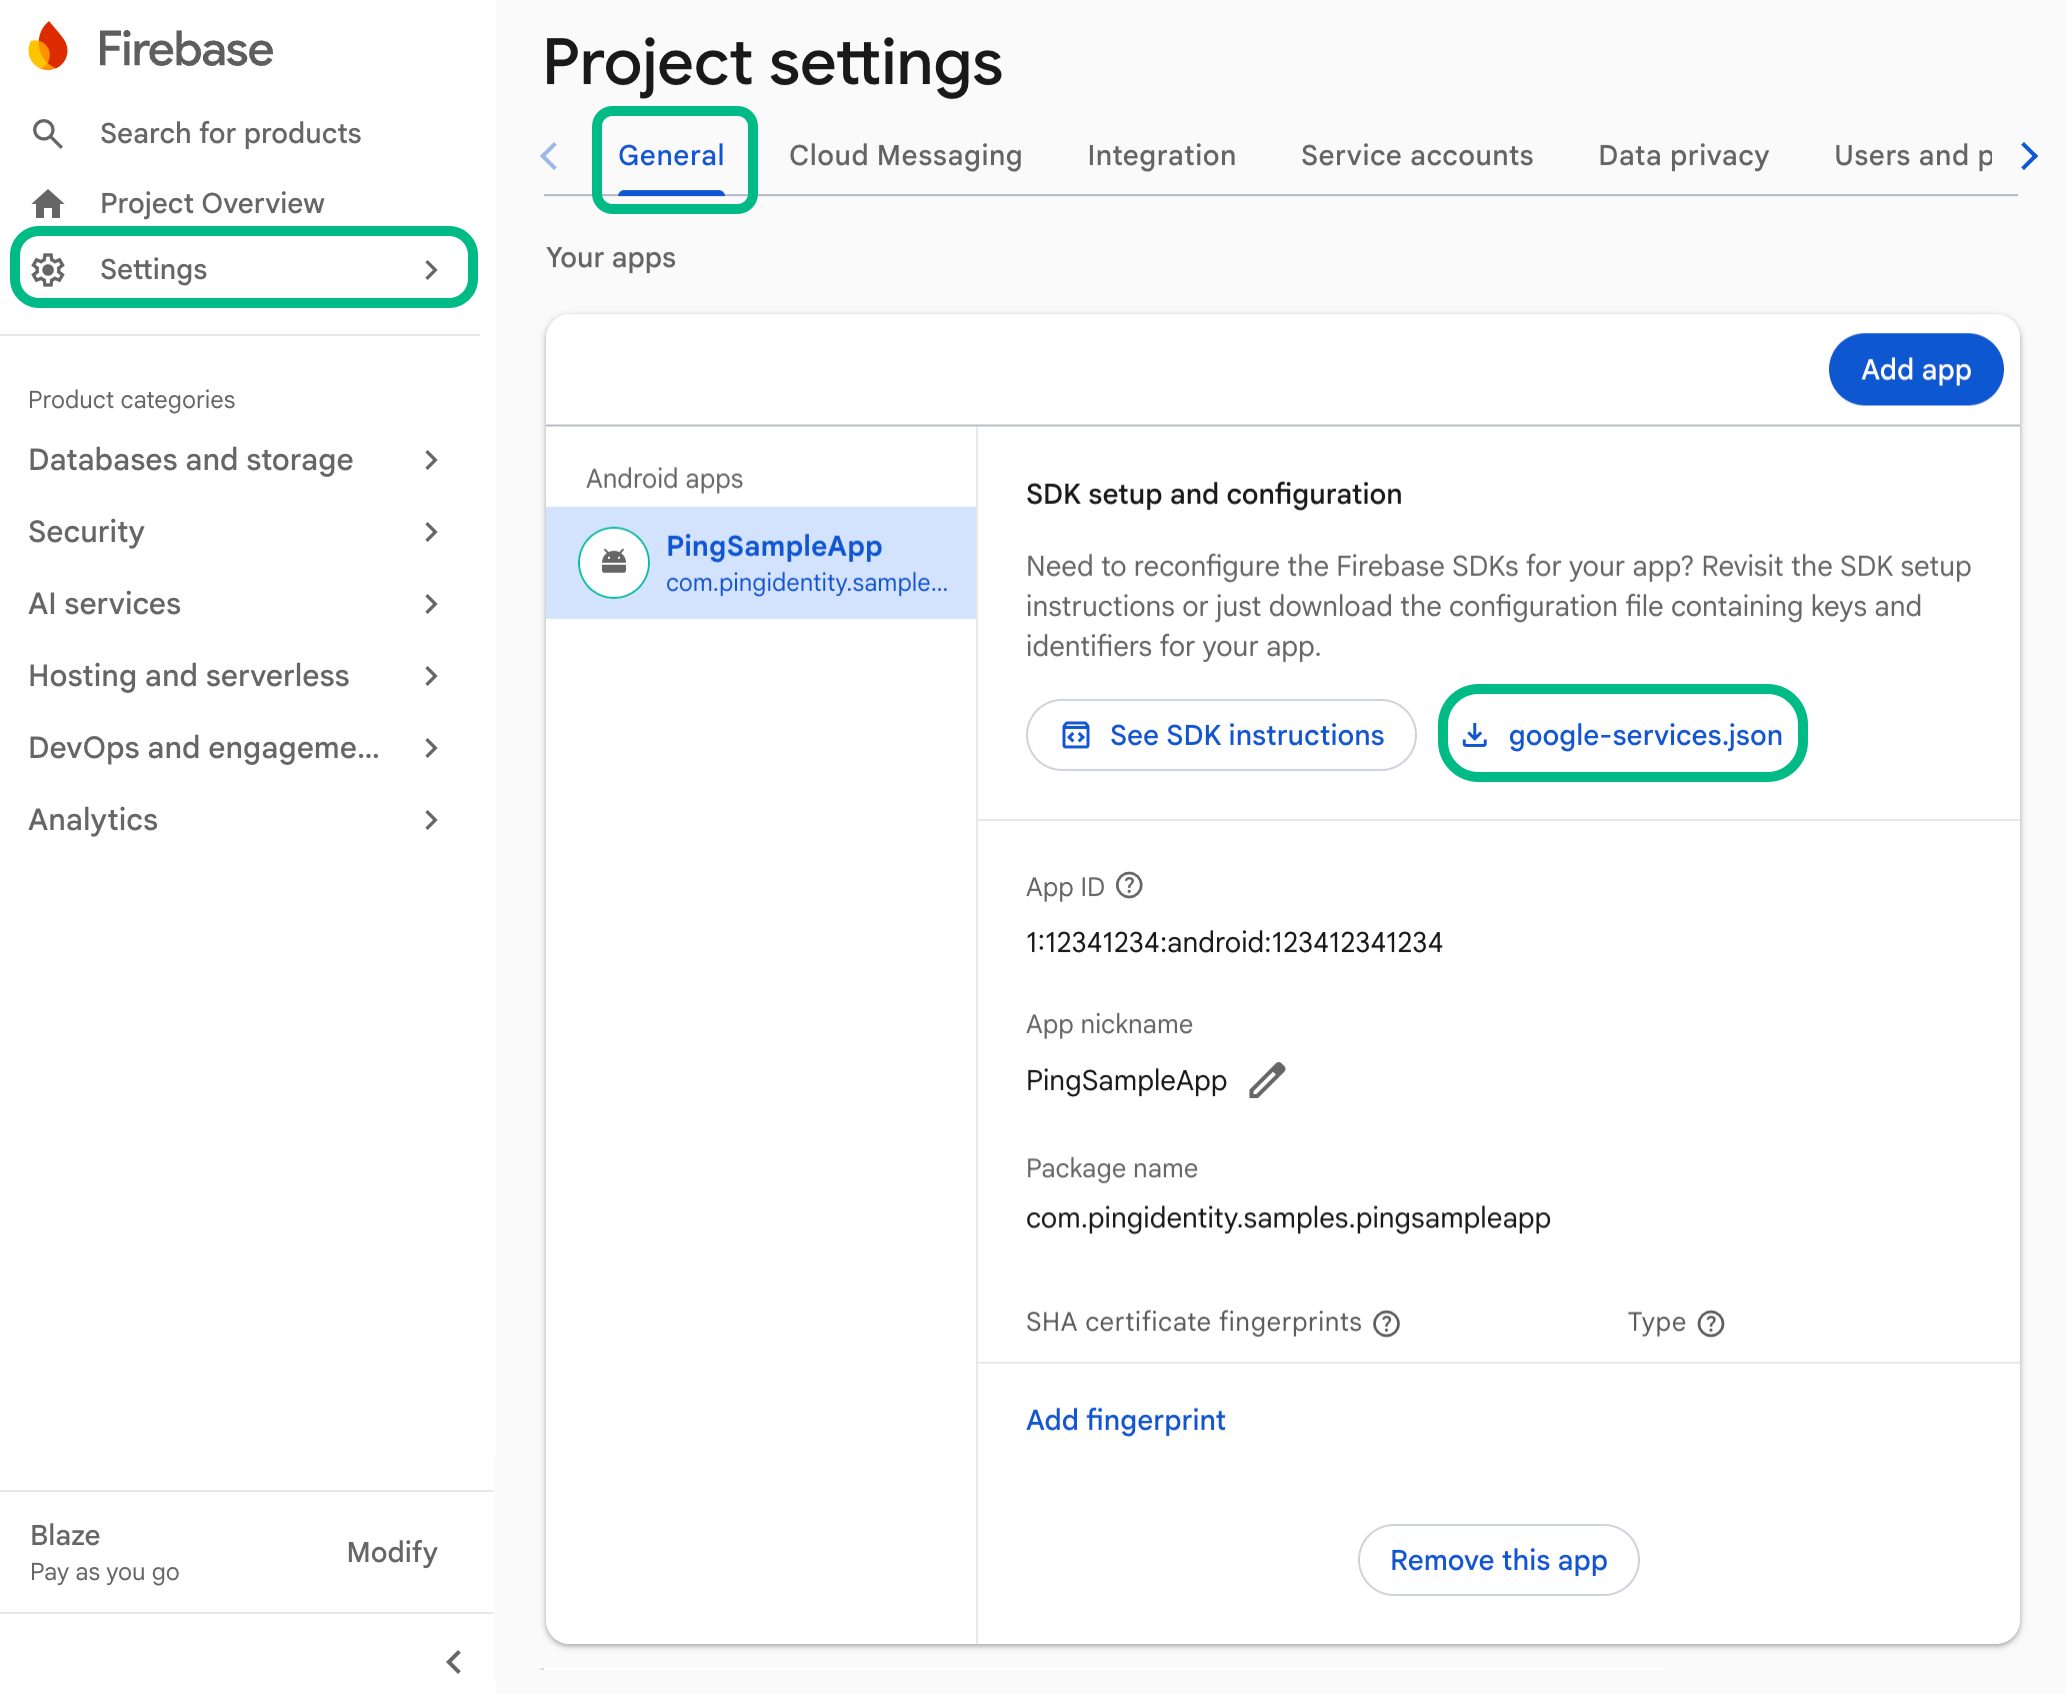
Figure 1. Downloading the
google-services.json file from the Firebase console. |
Creating the Firebase service account key
For PingOne to deliver a push to your app, it authenticates to FCM with a service account key from the same Firebase project.
To create the service account key:
-
In the Firebase console, on the Project settings page, open the Cloud Messaging tab and click Manage service accounts. The Google Cloud console opens at the service account for your Firebase project.
-
Select the Firebase Admin SDK service account, open the Keys tab, click Add key > Create new key, choose JSON, and click Create.
The Google Cloud console generates a new service account key, and automatically downloads the JSON file to your computer.
The PingOne configuration in the next section uploads this key to PingOne.
|
The service account key is a private credential that lets the holder send FCM messages as your Firebase project. Do not add it to your app, commit it to source control, or include it in any build artifact. Only the |
Step 2. Setting up your Android app
With FCM configured, add Firebase to your Android app so it can receive push notifications:
Adding Firebase to the app build
-
Add the Google Services Gradle plugin and the Firebase dependencies:
-
To your project-level Gradle file:
Project-level Gradle plugin declaration// Project-level build.gradle.kts plugins { id("com.google.gms.google-services") version "4.4.2" apply false } -
And your app-level Gradle file:
App-level Gradle plugin and Firebase dependencies// App-level build.gradle.kts plugins { id("com.google.gms.google-services") } dependencies { implementation(platform("com.google.firebase:firebase-bom:33.7.0")) implementation("com.google.firebase:firebase-messaging") }The Google Services plugin reads the
google-services.jsonfile at build time, so the build fails if the file is missing or its package name does not match theapplicationId.
-
-
Declare the notification permission in your manifest, because your app shows the approve and deny prompts as system notifications. The
pingonemfamodule also posts its own foreground-service notification while it completes a banner action. On Android 13 and later the permission is also requested at runtime, so prompt the user at an appropriate point in your app:Notification permission declaration<uses-permission android:name="android.permission.POST_NOTIFICATIONS" />
Step 3. Setting up PingOne
Creating the application and enabling push
In the PingOne admin console, an administrator creates the application that represents the mobile app. The application is a Native App (OpenID Connect) application with a Mobile tab in its profile.
To create the application:
-
Log in to your PingOne administration console.
-
In the left panel, navigate to Applications > Applications.
-
Next to the Applications label, click the plus icon ().
PingOne displays the Add Application panel.
-
In Application Name, enter a name for the application, for example
pingone-mfa-android. -
Select Native as the Application Type, and then click Save.
-
Enable the application by using the toggle next to its name.
With the application created, configure its mobile profile:
-
Open the application, select the Mobile tab, and then click the pencil icon ().
-
Under Android, click Configure for Android:
-
Under Google Play Services, in Package Name, enter the app’s package name.
This must match the package name registered in Firebase and the
applicationIdin the app build. -
Click + Add Push Notifications
-
Under Firebase Admin SDK Private key, click Select a file and upload the service account key JSON file you downloaded from Firebase.
-
The result will resemble the following:
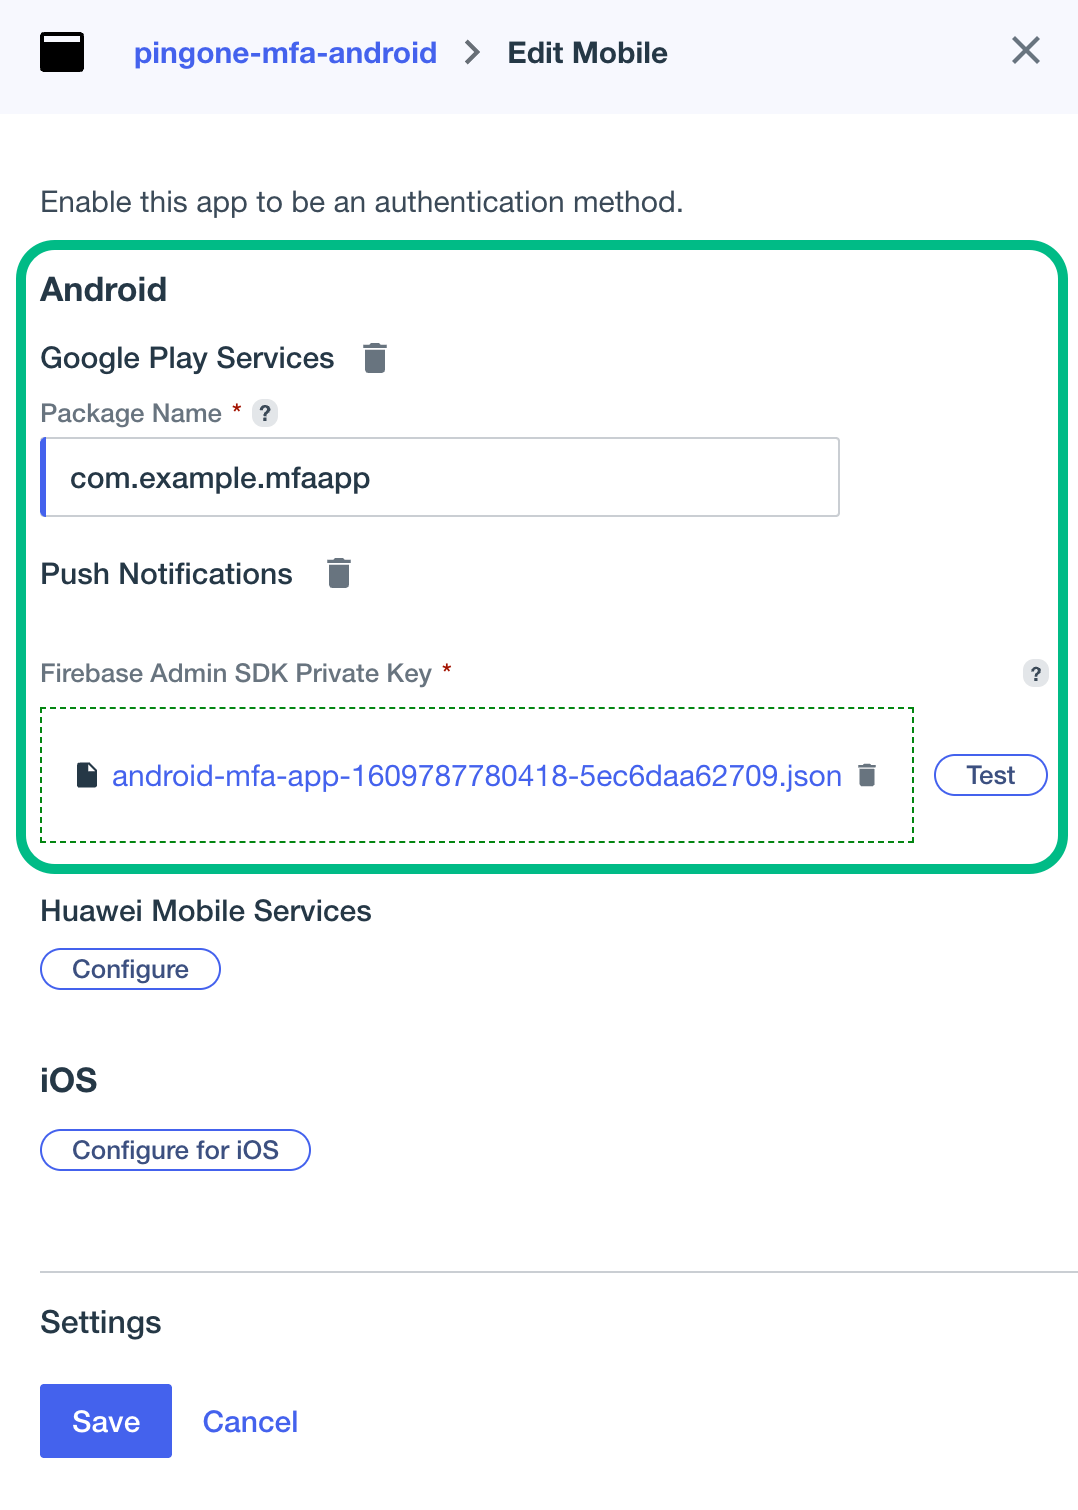 Figure 2. Configuring an Android application in the PingOne console.
-
-
Click Save.
Enabling push in the MFA policy
The MFA policy controls which authentication methods each application can use:
-
In the PingOne admin console, open Authentication > MFA, then the MFA Policies page, and open the policy your sign-on flow uses.
A new environment has a Default MFA Policy, so check it before creating a new one.
-
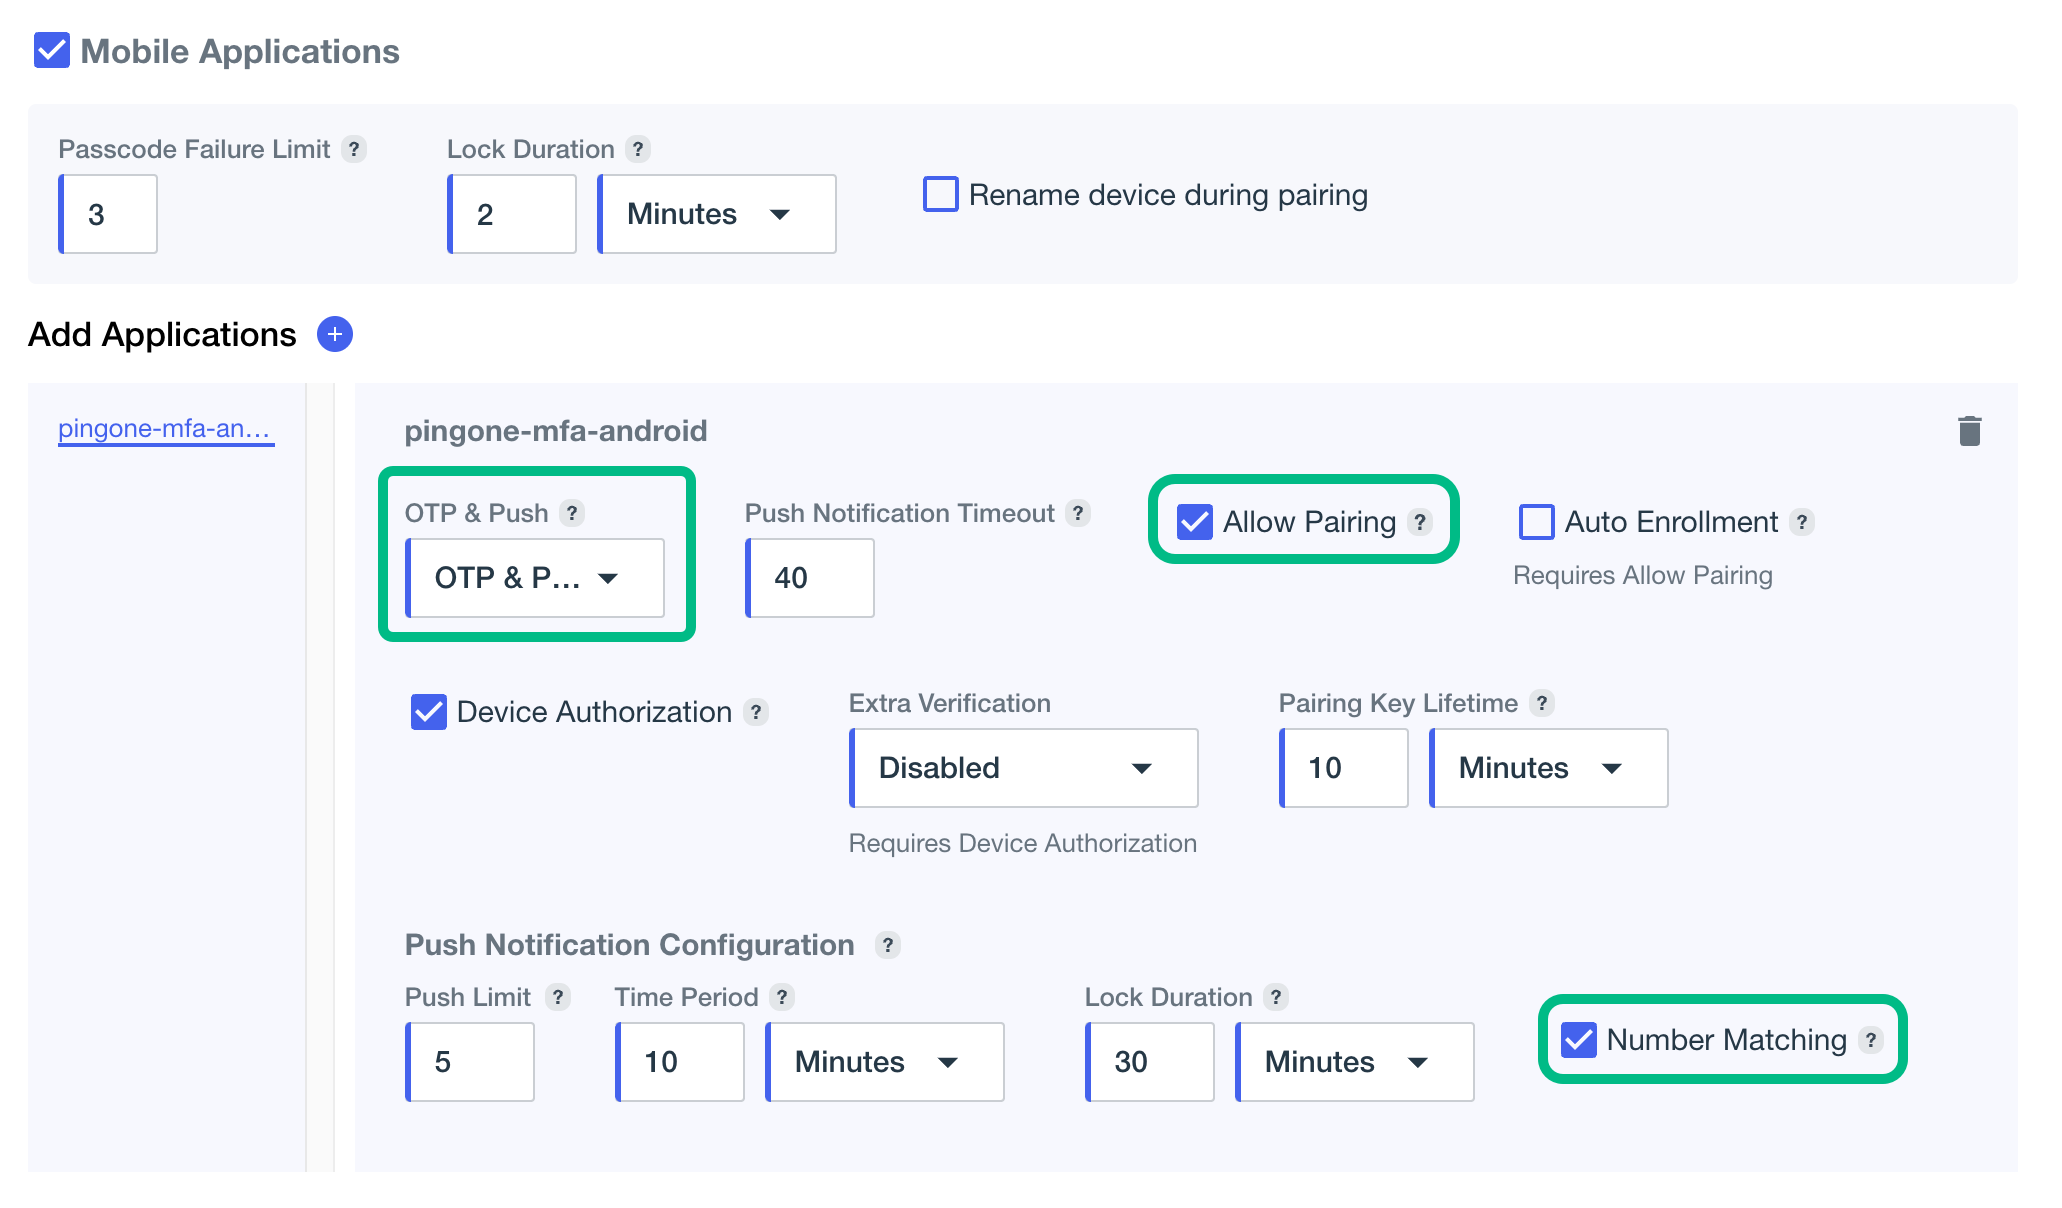
Under Allowed Authentication Methods, in Mobile applications, add the Android application you just created, and set its method to Push or OTP & Push.
-
Keep Allow Pairing enabled.
-
Optionally, enable Number Matching, to require users to select the number on their mobile device that matches the value displayed on the accessing device.
You can control how the user enters the correct number by configuring the Number Matching Options property on the Mobile tab of your application in PingOne.
-
Click Save.
The result will resemble the following:
Step 4. Setting up DaVinci
A DaVinci flow that runs on the accessing device sends the push notification, after the user has signed on with their first factor.
Build that flow in the DaVinci admin console using the PingOne MFA connector:
-
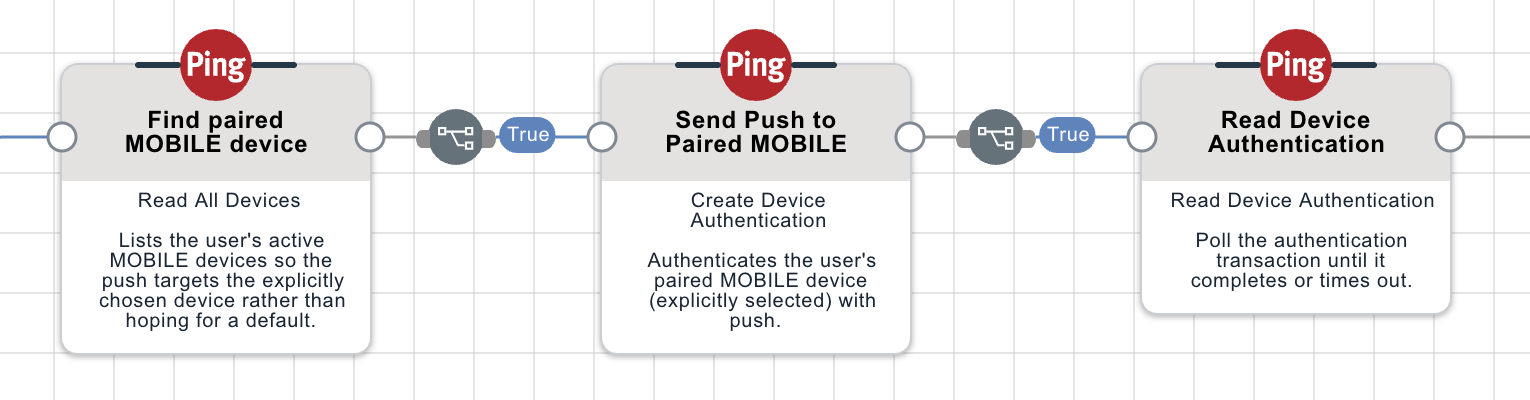
Find the user’s devices — add a Read All Devices capability from the PingOne MFA connector. It lists the user’s active MFA devices so the flow can target the push at a specific paired device rather than hoping for a default.
-
Create the authentication request — add a Create Device Authentication capability from the PingOne MFA connector, and map the device from the Read All Devices node to its input. This is the capability that sends the push notification to the paired device.
-
Check the result — add a Read Device Authentication capability from the PingOne MFA connector to poll the authentication transaction until it completes or times out, then branch on the result. If the transaction shows that push confirmation timed out, the flow can resend the push or fall back to another method.
The resulting push notification segment of your DaVinci flow might resemble the following:
If your users have several paired devices, add the PingOne MFA connector’s Device Selection capability between the first two capabilities so the user can choose which device receives the push.
Both the Read All Devices and Create Device Authentication capabilities have an Application setting that selects which PingOne application the capability acts on. Select the Native App (OpenID Connect) application that represents your mobile app, the same application configured in Creating the application and enabling push.
When the flow reaches the Create Device Authentication node, PingOne sends the push notification. The Read Device Authentication node completes when your app approves or denies the request, and the flow resumes with the result.