Smarter “Remember Me” with PingOne Protect
Smarter “Remember Me” with PingOne Protect: seamless, secure logins that adapt to risk without disrupting the user experience.
This post was originally published on Medium.
Introduction
In the world of Identity and Access Management (IAM), it’s always a balancing act between security and user experience. Organisations want to introduce just the right amount of friction, at the right moment, and in the right context to protect users without disrupting them. The goal is to maintain a seamless, trusted customer journey while minimising drop-off and frustration.
To achieve this, many businesses have implemented a “Remember Me” capability within their web channels. Once a user successfully signs in, subsequent visits allow them to be logged in automatically without re-entering their credentials — a familiar and convenient feature which is especially common in retail environments.
However, “Remember Me” in isolation has its flaws. While it delivers convenience, it often lacks the intelligence to adapt when the context changes. For example, what if a user originally authenticates from the UK but suddenly appears to log in from Singapore — an impossible traveller scenario? What if their IP address shifts unexpectedly, the login occurs at an unusual time, or even worse, a bot attempts access? Without continuously evaluating these contextual signals, “Remember Me” might meet the bar for user experience but falls short on adaptive security — failing to introduce the right friction at the right moment.
This is where PingOne Protect steps in. It continuously analyses behavioural and contextual signals across multiple attack vectors to assign risk scores and trigger appropriate mitigation or action, to ensure convenience is not achieved at the expense of security.
To learn more about the use cases for PingOne Protect integration with PingOne Advanced Identity Cloud (P1AIC) check out this link.
Use Case
In this blog, we’ll enhance the Persistent Cookie feature in PingOne Advanced Identity Cloud — the functionality that enables the “Remember Me” capability by integrating it with PingOne Protect.
Here’s how it works:
During the initial login, PingOne Protect evaluates the context and returns a risk score:
- If the score is low, a Persistent Cookie (PCookie) is set, and the login proceeds as normal.
- If the score is not low, no PCookie is set — effectively disabling “Remember Me” for that session, but does so silently, without disrupting the user experience.
On subsequent visits, if a valid PCookie is found, PingOne Protect performs another risk assessment:
- If the risk remains low, the cookie is trusted, a new session is created automatically and the user is seamlessly signed in.
- If the risk is elevated, the user isn’t blocked outright; instead, the PCookie is deleted and they’re redirected to re-enter their credentials — introducing just the right level of friction, at the right moment, based on the current context and signals.
Solution
Let’s get building! 💪
Before we dive in, it’s worth noting that this solution showcases the power of the PingOne platform — apart from a single Custom Node used to display nodeState variables for clarity and education, it’s built entirely with out-of-the-box nodes, requiring no customisation or extensions.
Setup a Mapped PingOne Environment
In this section we’ll create a PingOne environment with PingOne Protect deployed:
- If you have a PingOne subscription navigate to this page and hit “Sign On” at the top right of the page and login. On success you’ll be re-directed to the https://console.pingone.eu/ page. If you don’t have a subscription, you can get a demo environment through this link. Enter your business email address and hit “Try Ping”.
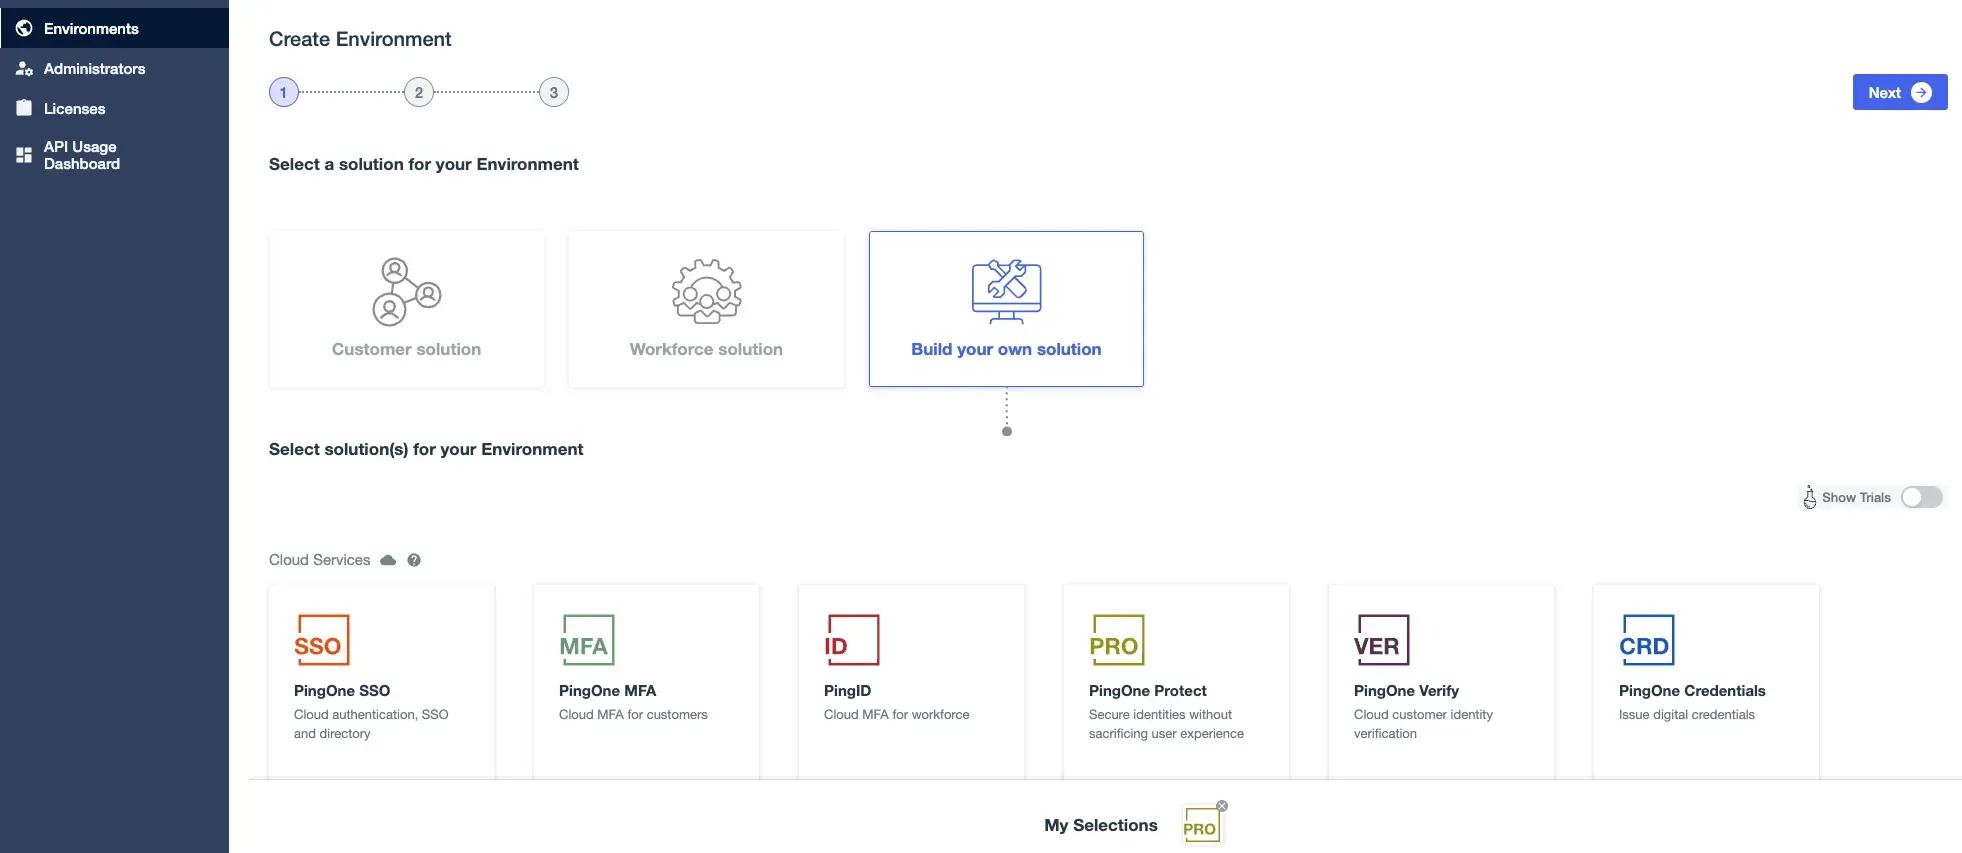
- From the PingOne Console > Hit Environments on the left panel > Blue + icon next to Environments.
- Select Build your own solution > click PingOne Protect > Hit Next.
- On the environment name enter an appropriate name, for example
env-pingoneaic-**mycompany-ew2-sandbox1**> Select the region > Hit Finish.
Create a Worker Application
Follow these steps to create OIDC credentials for the PingOne AIC tenant to integrate with PingOne Protect. Note the PingOne API and Authorization URLs, for example https://auth.pingone.com, https://auth.pingone.eu etc.
Create Environment Secrets and Variables (ESVs) in P1AIC
-
Follow these steps to create three ESVs that map to the PingOne Worker Credentials from the last step.
-
Additionally, create an ESV named
esv-hmac-signing-key(string secret) to sign the persistent cookie. Generate a 256-bit key using one of the following commands:- OpenSSL:
openssl rand -base64 32
- OpenSSL:
-
Finally create an ESV (string variable) called
esv-persist-cookie-domainwith a value of the Fully Qualified Domain Name of your tenant. For exampleopenam-darinder-test.forgerock.io.
These ESVs make it easy to update configuration values when promoting to higher environments.
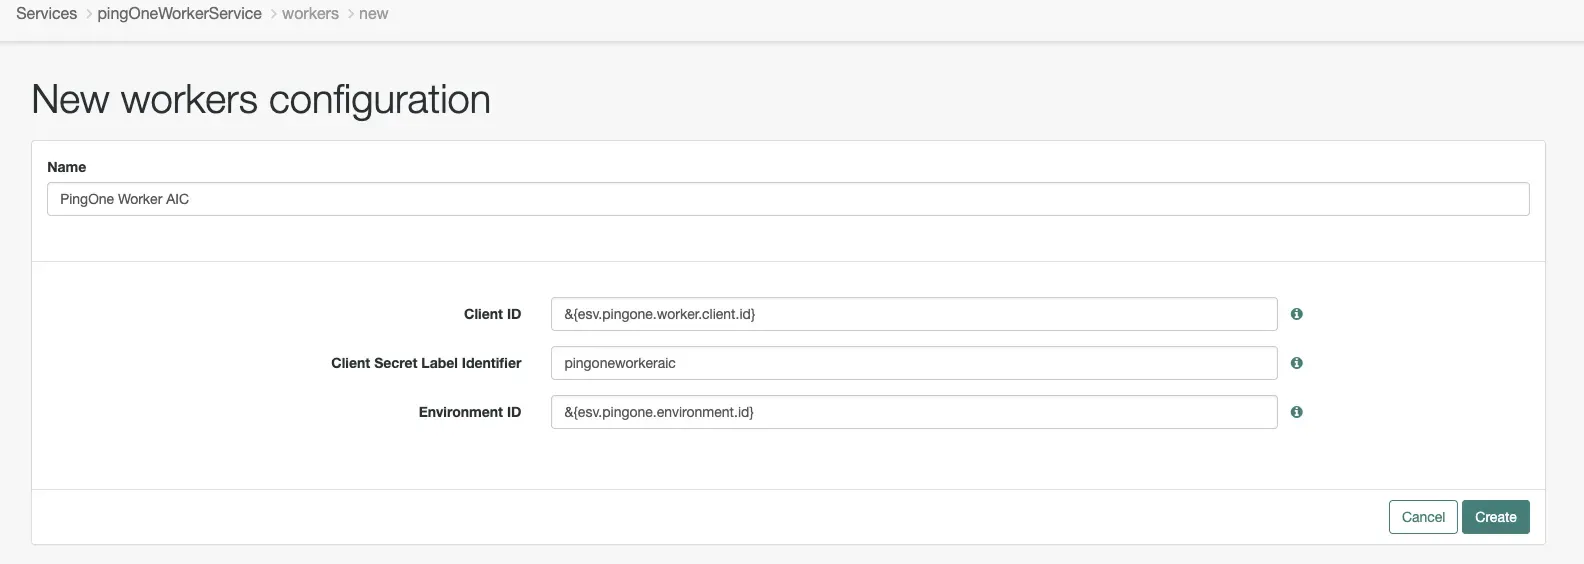
Create a PingOne Service in P1AIC
Follow these steps to create a PingOne Service in your P1AIC tenant. For the secondary configuration be sure to use the ESVs defined above.
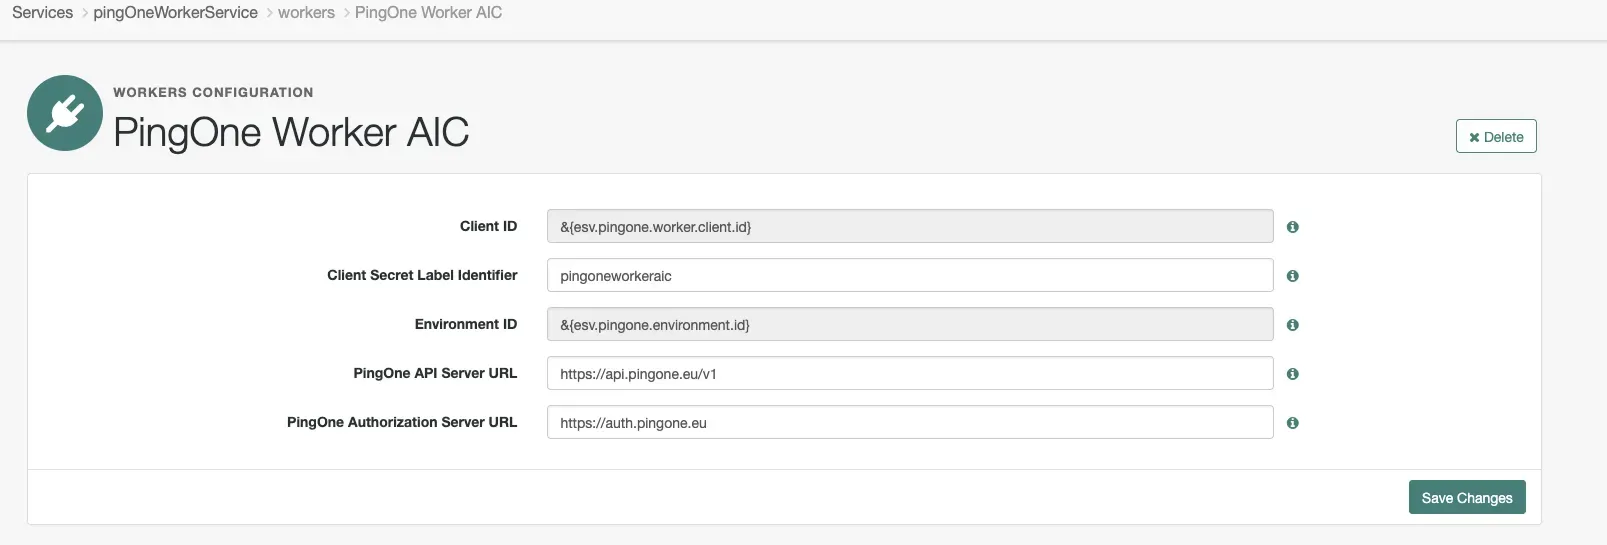
After creating the configuration set the PingOne API Server URL and Authorization Server URL as per the address noted in the “Create a Worker Application” section:
Import the Custom Display NodeState Node
- Download
Display-NodeState.jsonfrom GitHub here to your local machine. - From the P1AIC platform admin UI, expand Journeys on the left navigation panel > Custom Nodes
- Click Import Nodes (or Import if other Custom Nodes are present) > Browse > open
Display-NodeState.json> Import Nodes > Done. A new node called Output Variable from NodeState should be created.
Journey Import
- From the
journey_exportsdirectory here, download the journey to your local machine. - From the P1AIC platform admin UI, expand Journeys on the left navigation panel > click Journeys > Import.
- If need be take a backup or skip.
- Click Browse > find the
PersistWithProtect-journeyExport.jsonfile > Open > Next > Start Import.
A few points to note:
- The PingOne Protect Evaluation nodes uses the default
Risk Policy Set ID.As a best practice a new risk policy should be created and the ID set in this parameter. From the PingOne Console > Expand Threat Protection > Risk Policies > Global Policies Blue + > Set a name > Configure as required > Apply > Copy the resulting Policy ID into this parameter. For examplea05cccb8-ada5–44e3-a6cd-cefdbc0c942f - Additional
BOT_MITIGATIONandAITM_MITIGATION(Adversary-In-The-Middle) items were added to the Recommended Actions parameter of the PingOne Protect Evaluation nodes to demonstrate the node’s flexibility in mapping specific risk results to additional outcomes. - The PingOne Protect Result node captures additional context just before the session is created, ensuring maximum accuracy for future assessment of the user’s risk posture and behaviour.
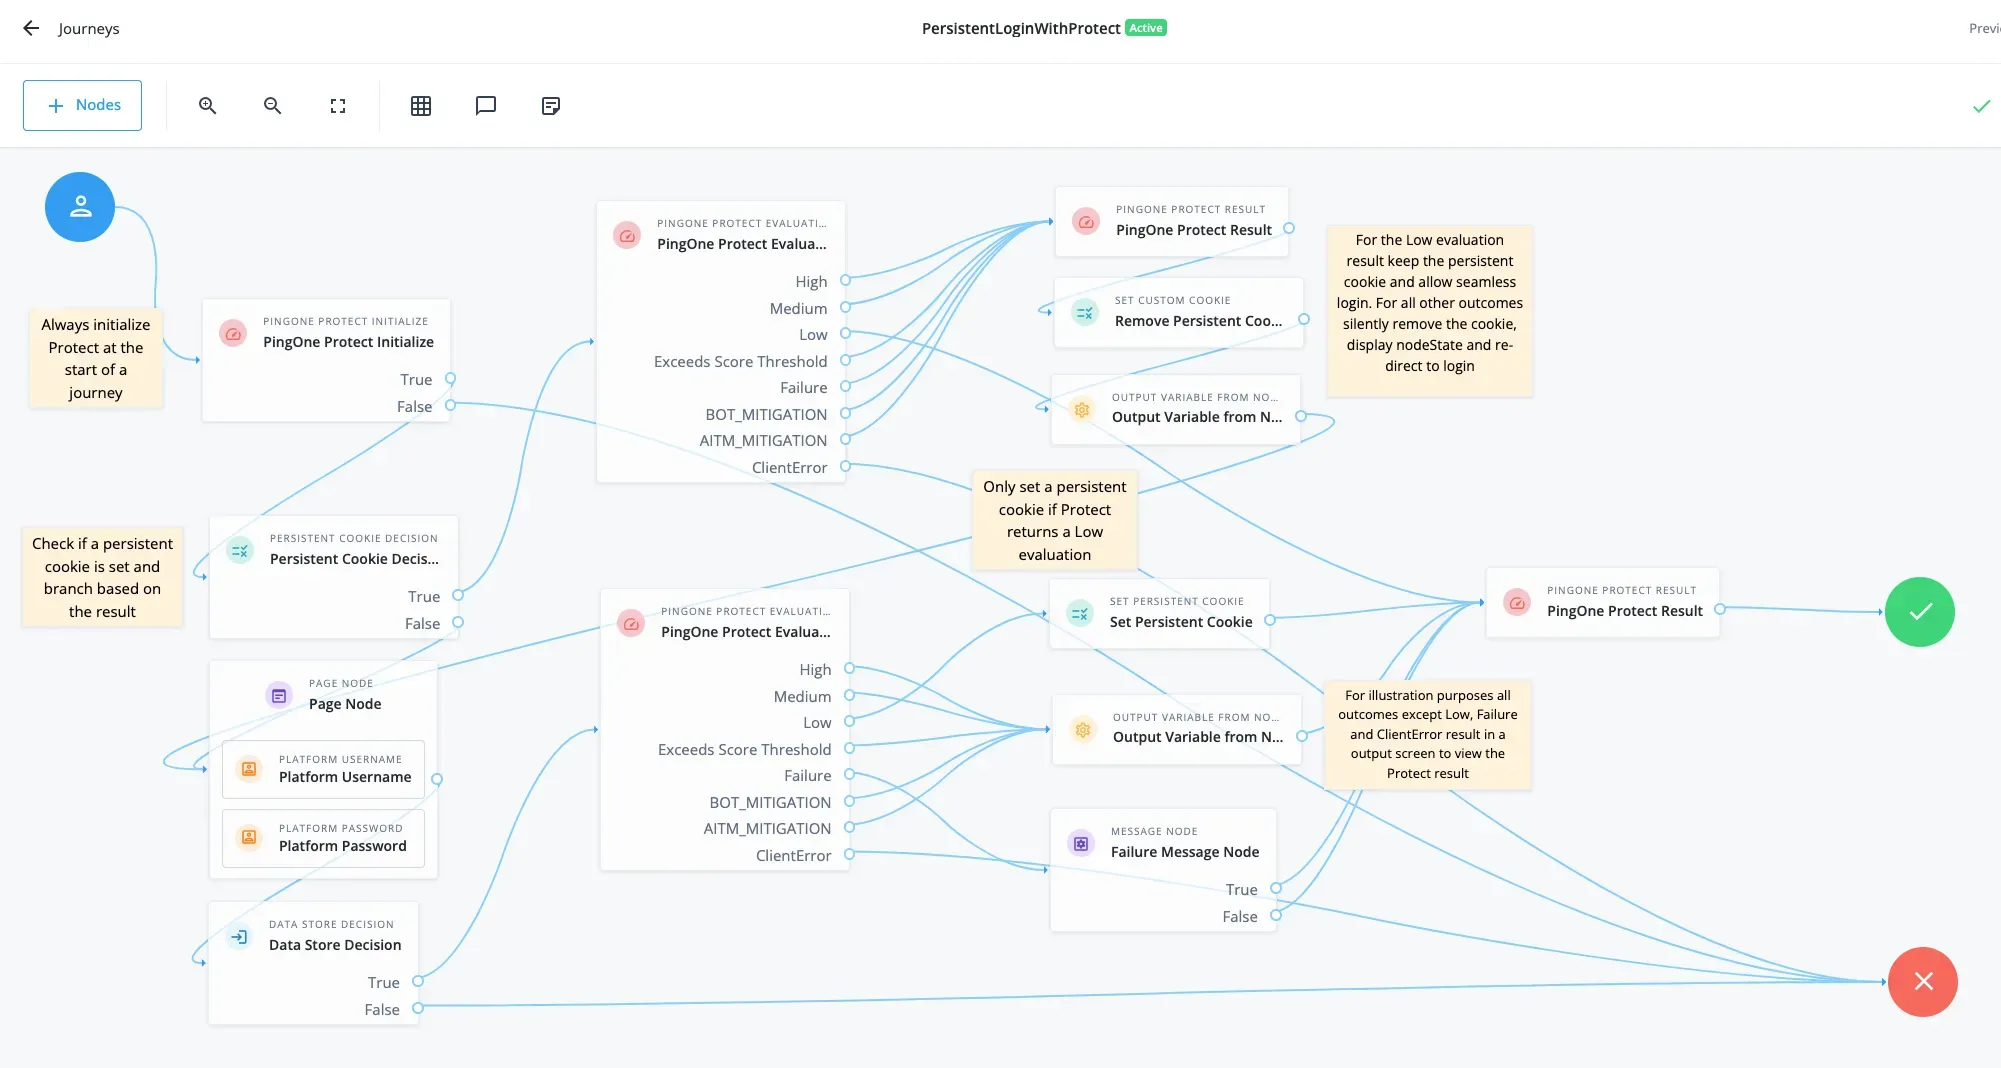
Journey Breakdown
This journey demonstrates how to implement a “Remember Me” (persistent login) flow enhanced with PingOne Protect risk evaluation.
It combines persistent cookie management with adaptive risk analysis to allow seamless logins for low-risk sessions while enforcing re-authentication for higher-risk ones.
On every execution of the journey, the PingOne Protect Initialize node runs first to begin context and device data capture.
-
The journey then checks for the presence of a persistent cookie named
persist-session. -
If persist-session is found:
- The PingOne Protect Evaluation node calls PingOne Protect to evaluate the context and calculate risk.
- For a Low risk outcome, the PingOne Protect Result node is invoked, and seamless “Remember Me” functionality is preserved.
- For any other outcome, the persistent cookie is removed, the PingOne Protect Risk value stored in nodeState is displayed for insight, and the user is redirected to authenticate again.
-
If persist-session is not found:
- The user is prompted for their username and password, and the PingOne Protect Evaluation node again evaluates context and risk.
- If a Low risk outcome is returned, a new persistent cookie is set, enabling “Remember Me” on future logins.
- For all other outcomes (except ClientError, which shows an error message), the PingOne Protect Risk value is displayed for eudcation and understanding.
- Login is still permitted — the session proceeds, but without setting the persistent cookie — ensuring user access is not disrupted, only “Remember Me” functionality is withheld.
Demo
Check out the video below for a live demo
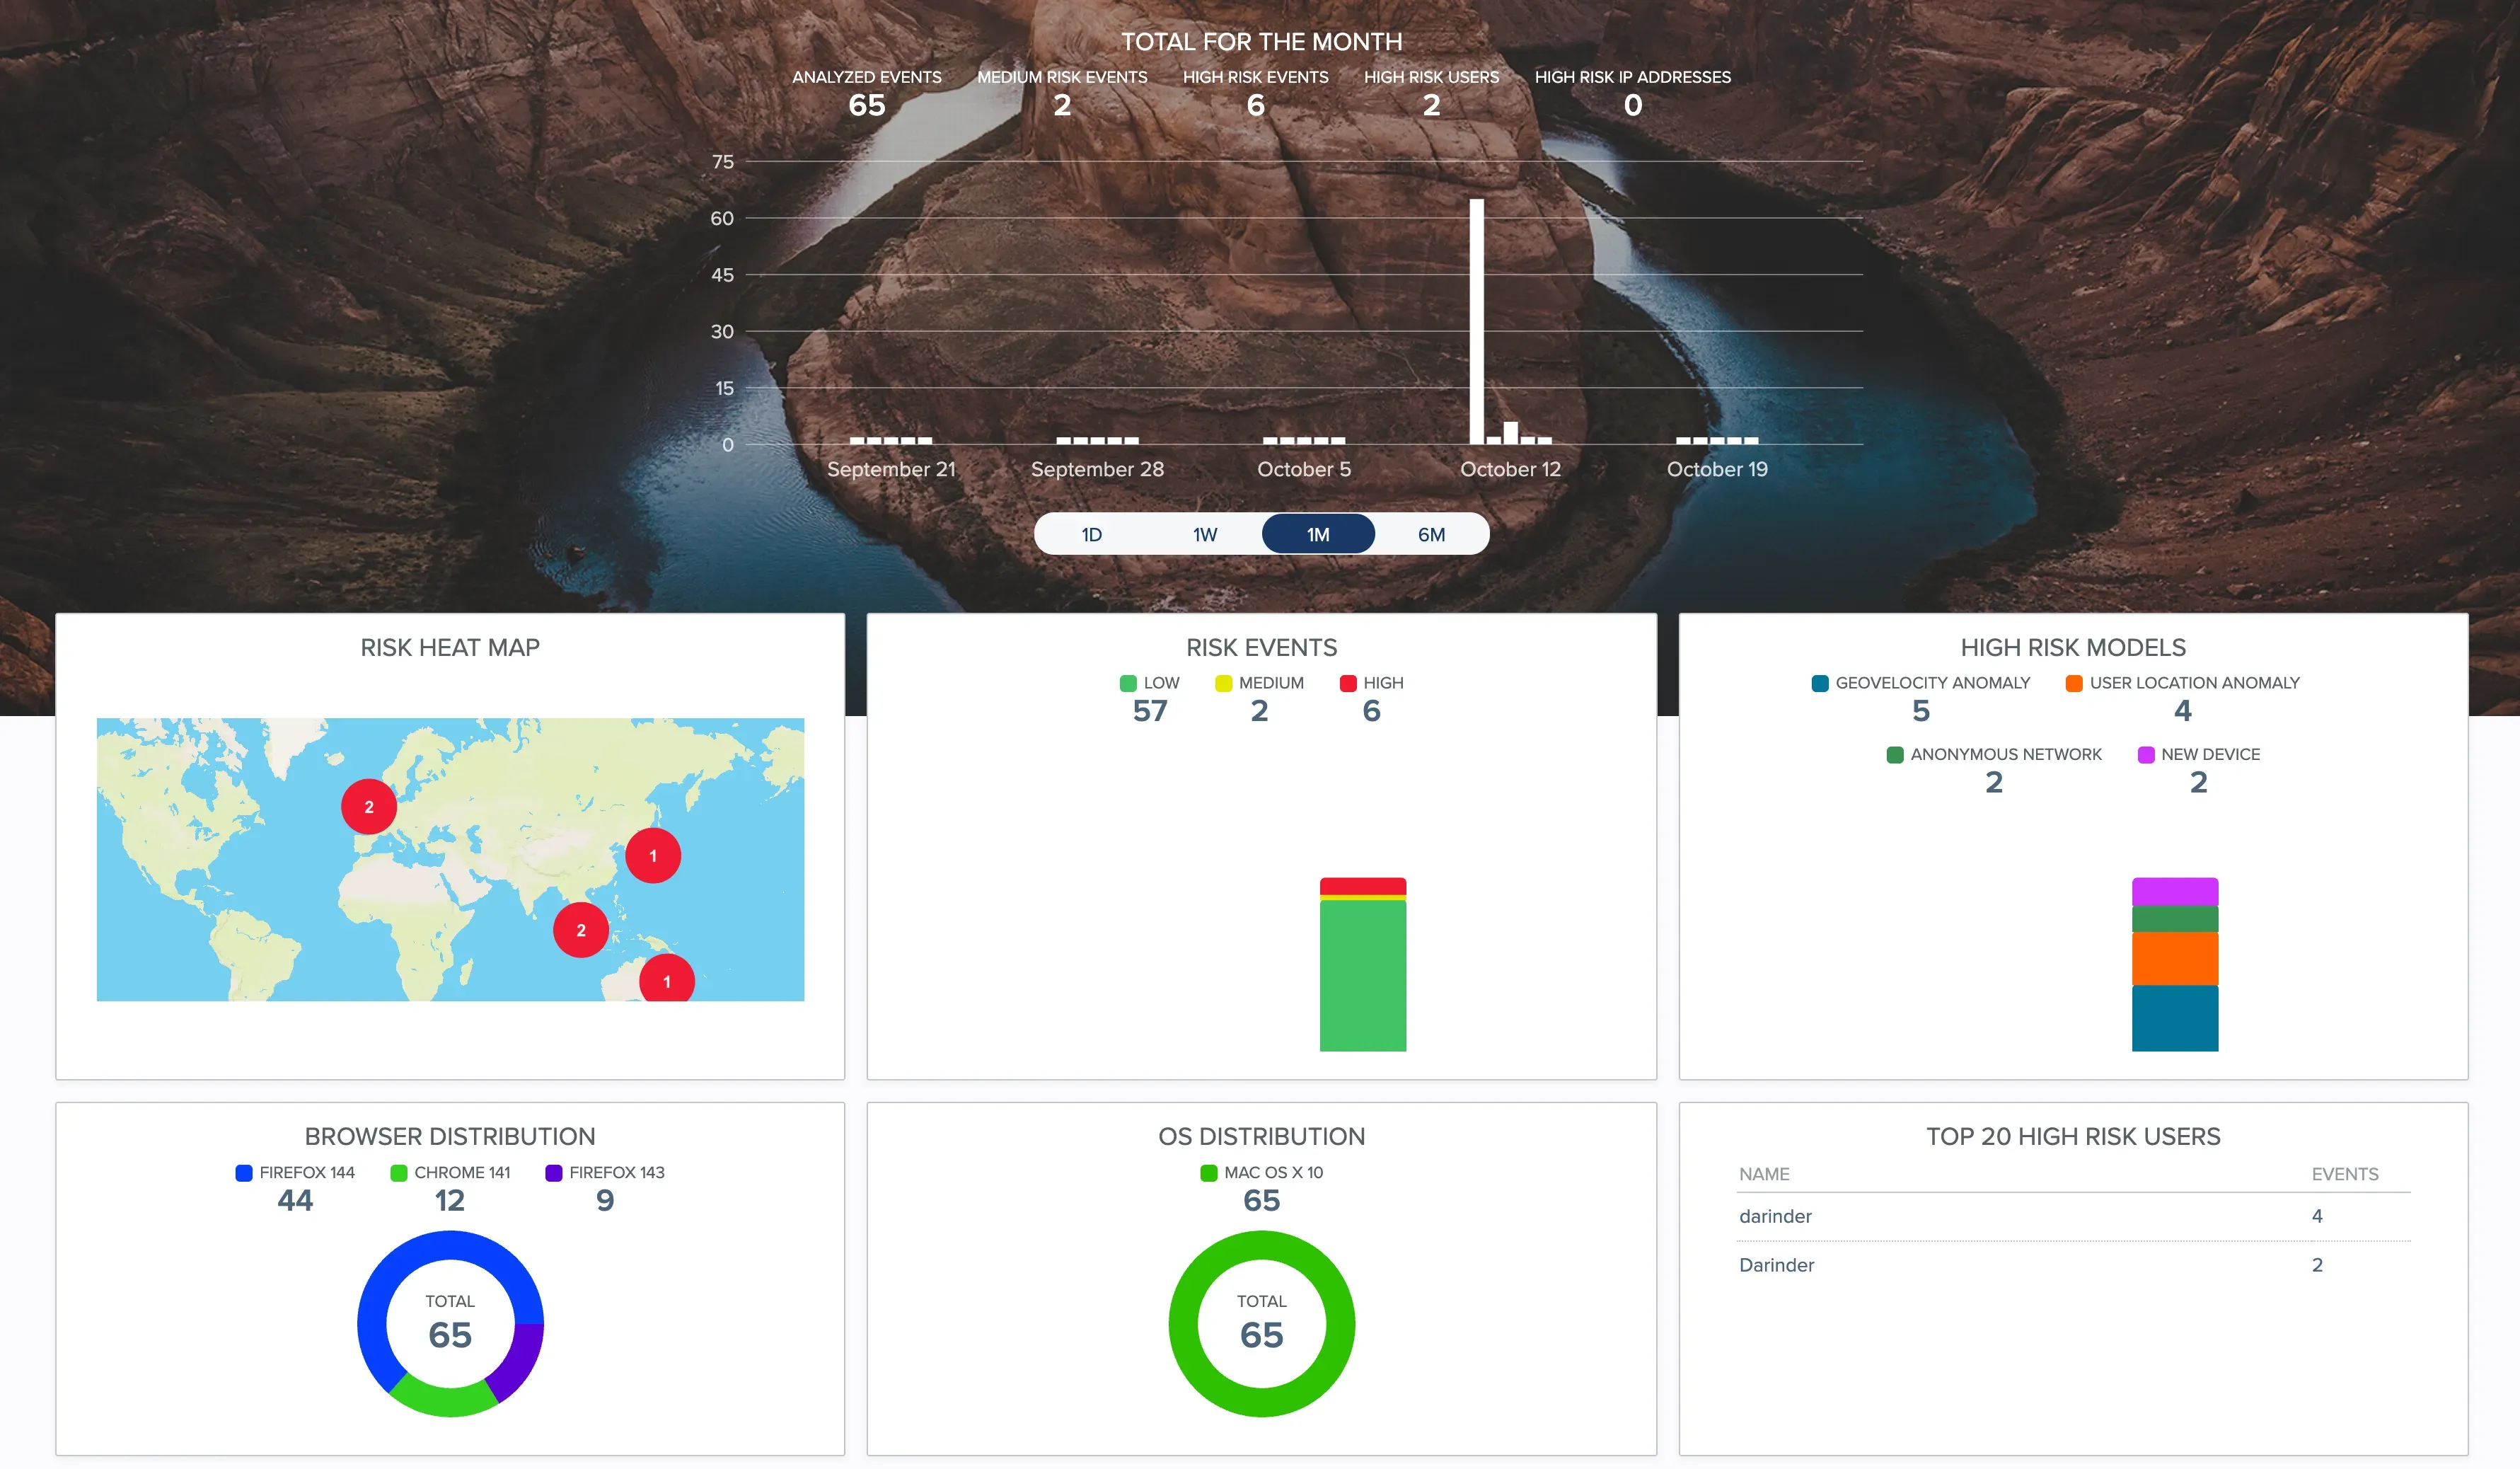
PingOne Protect offers powerful monitoring and visual dashboards that translate complex security data into clear, actionable insights. With real-time visibility into analysed events, risk trends, geolocation anomalies and high-risk user behaviour, organisations can quickly assess and respond to emerging threats. Here’s an example dashboard:
Conclusion
The integration of PingOne Protect with PingOne Advanced Identity Cloud elevates a simple “Remember Me” feature into an intelligent, adaptive security capability. By continuously evaluating contextual and behavioural risk, it ensures that convenience does not come at the expense of protection.
Users enjoy seamless, low-friction logins when their behaviour is trusted, while higher-risk sessions automatically trigger the right level of friction — discreetly and without disruption. The result is a smarter, more secure “Remember Me” experience that balances usability with robust risk-based control — all achieved through a no-code, out-of-the-box Ping Identity platform implementation.
